Zero-Waste Slavic Folk Shirt Patterns: 2026 Construction Guide
The Renaissance of Zero-Waste Geometric Cutting in 2026
As the global fashion industry and independent sewing communities increasingly prioritize sustainability in 2026, historical garment construction techniques are experiencing a massive renaissance. Among the most celebrated of these methods is the zero-waste geometric cutting system used for centuries in traditional European folk dress. Unlike modern commercial patterns that rely on curved armholes, princess seams, and shaped side panels—resulting in up to 20% fabric waste on the cutting room floor—traditional Slavic and Nordic folk shirts were engineered to use every single inch of woven cloth.
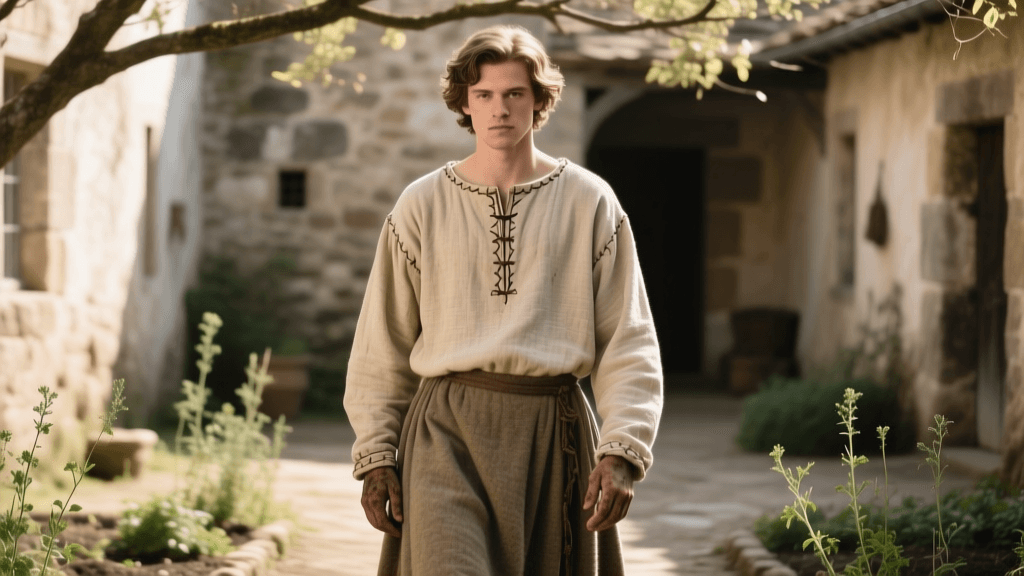
The traditional Eastern European shirt, widely known as the rubakha (or sorochka), and its Nordic counterpart, the skjorta, are masterclasses in spatial efficiency and structural ingenuity. By relying entirely on rectangles, squares, and triangles cut along the straight grain of the fabric, historical makers created garments that were exceptionally durable, easy to repair, and entirely zero-waste. In this comprehensive 2026 guide, we will explore the anatomy of these historic garments, provide a detailed mathematical framework for drafting your own pattern, and outline the authentic seam finishes required to create a folk shirt that will last generations.
Anatomy of the Traditional Rubakha and Nordic Skjorta
To understand the geometry of European folk dress, one must first understand the historical constraints of the loom. Prior to the industrialization of textile manufacturing, cloth was woven on narrow handlooms, typically producing fabric widths of only 14 to 22 inches. Because weaving was an incredibly labor-intensive process, cutting into the fabric and discarding the scraps was economically and culturally unthinkable. Instead, the width of the loom dictated the width of the garment panels.
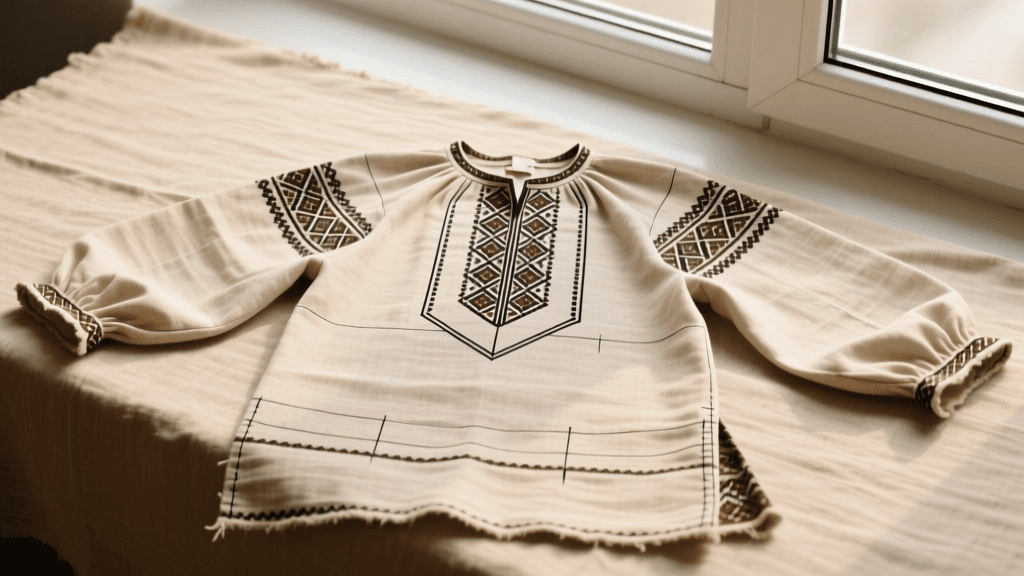
A traditional rubakha is essentially a puzzle of interlocking geometric shapes. The main body consists of two large rectangles (front and back) or one continuous rectangle folded over the shoulders. The sleeves are also simple rectangles. The true genius of the design, however, lies in the gussets and godets. Because rectangles do not naturally conform to the three-dimensional curves of the human body, makers inserted square gussets under the arms to provide shoulder mobility, and triangular godets along the side seams to allow for walking and hip movement.
The Power of the Gusset and Godet
The underarm gusset (known as the lastovitsa in Russian or kil in Swedish) is the structural heart of the folk shirt. Typically measuring between 4x4 inches and 6x6 inches, this square piece of fabric is inserted into a slashed opening where the sleeve meets the body. When the arm is raised, the bias grain of the square gusset stretches and pivots, providing a remarkable range of motion without pulling the main body of the shirt upward. Side godets (triangular inserts) are added from the waist or hip down to the hem, providing the necessary flare for a tunic-length garment to be worn over trousers or skirts while working in the fields.
2026 Fabric Sourcing: Heritage Linens and Hemp Blends
Authentic European folk dress relies heavily on cellulosic fibers. While historical peasants used locally processed, often coarse flax, the 2026 textile market offers a stunning array of heritage and sustainably farmed linens and hemp blends. According to the University of Minnesota Extension's research on sustainable fiber crops, the revival of regional flax farming and eco-conscious retting processes has made high-quality, traceable linen more accessible to independent makers than ever before.
When selecting fabric for a zero-waste rubakha, you must account for the fact that modern linens are usually 54 to 60 inches wide, whereas historical fabrics were much narrower. To maintain the zero-waste ethos, you must plan your layout so that the remaining 18-inch strips are utilized entirely for sleeves, gussets, godets, and neckband binding, leaving absolutely nothing for the scrap bin.
Comparison Table: Top 2026 Heritage Linens for Folk Shirts
| Fabric Type | Weight (oz/yd²) | Drape & Hand | Best Use in Folk Shirt | 2026 Avg Price/Yard |
|---|---|---|---|---|
| Heavyweight Belarusian Linen | 10.5 oz | Crisp, structured, softens with washing | Outerwear shirts, winter base layers | $28.00 |
| Mid-weight Swedish Hemp/Linen | 7.2 oz | Fluid but resilient, excellent breathability | Everyday rubakha, summer festival wear | $34.50 |
| Lightweight Irish Ramie/Linen | 5.0 oz | Silky, highly draped, slightly sheer | Undergarments, delicate gathered cuffs | $22.00 |
Step-by-Step Pattern Drafting & Construction
Drafting a zero-waste geometric pattern requires shifting your mindset from curved tailoring to modular math. You will need your chest circumference, bicep circumference, shoulder-to-hem measurement, and sleeve length. Below is the blueprint for drafting a mid-thigh length rubakha using modern 54-inch wide linen.
Drafting the Main Body and Sleeves
- Main Body Panel: Calculate your body width by taking your full chest measurement, dividing by two, and adding 4 to 6 inches of ease. For a 40-inch chest, your body panel width is 26 inches. Cut two rectangles measuring 26 inches wide by your desired shoulder-to-hem length (e.g., 36 inches).
- Sleeve Panels: Measure your bicep and add 3 inches of ease. Cut two rectangles measuring this width (e.g., 16 inches) by your desired sleeve length (e.g., 22 inches).
- Gussets: Cut two perfect squares, measuring 5x5 inches each. Ensure these are cut exactly on the straight grain so the bias runs diagonally across the square.
- Side Godets: Cut two right-angled triangles. The straight edge should be 20 inches long (to match the side seam insertion point), and the base should be 8 inches wide to provide adequate hem flare.
- Neckline Binding and Cuffs: Utilize the remaining fabric strips to cut 2-inch wide binding for the neckline and 3-inch wide rectangles for the wrist cuffs.
Inserting the Underarm Gusset (The Lastovitsa)
Inserting a square gusset into a straight slash is the most technically demanding aspect of folk shirt construction. First, fold your main body panels and mark the shoulder line. Measure down 10 inches from the shoulder and make a 5-inch vertical slash parallel to the side seam. This slash will accommodate two sides of your 5x5 gusset.
Pin one edge of the gusset to the slashed opening, right sides together, and stitch with a 1/4 inch seam allowance. Stop exactly 1/4 inch from the corner, pivot, and stitch the adjacent side of the gusset to the other side of the slash. Next, attach the sleeve rectangle to the top two edges of the gusset, and finally, sew the side seam of the body and the underarm seam of the sleeve, which will meet at the bottom corner of the gusset. The Smithsonian Center for Folklife and Cultural Heritage frequently highlights how these specific geometric insertions allowed historical garments to withstand decades of rigorous agricultural labor without tearing at the stress points.
Authentic Seam Finishes for Longevity
Because traditional folk shirts were unlined and worn directly against the skin, all interior seams had to be completely enclosed to prevent fraying and chafing. Modern makers using sergers miss the historical authenticity and structural benefits of hand-finished seams. For a truly authentic 2026 reproduction, utilize the run-and-fell seam technique.
To execute a run-and-fell seam, place your fabric pieces wrong sides together and sew a standard 3/8 inch seam. Trim one side of the seam allowance down to 1/8 inch. Fold the longer seam allowance over the shorter one, encasing the raw edge, and press flat. Finally, stitch the folded edge down to the main fabric using a running stitch or a modern machine straight stitch. This creates a flat, incredibly strong seam that is virtually indestructible and looks beautiful on both the inside and outside of the garment. This technique is mandatory for the underarm gusset seams, which endure the highest friction.
Protective Embroidery and the Gathered Neckline
Once the structural construction is complete, the neckline must be finished. Rather than a modern curved collar, the rubakha features a simple slit neckline gathered into a narrow band. Cut a vertical slit down the center front of the body panel (about 6 inches deep). Run two rows of gathering stitches along the entire neckline edge, including the top of the sleeves, and pull the threads to gather the fabric until it fits snugly around your neck. Bind the gathered edge with your reserved linen strips.
Historically, the raw edges of the garment—the neckline, the cuffs, and the hem—were considered vulnerable entry points for malevolent spirits. To protect the wearer, these areas were heavily fortified with intricate cross-stitch or counted-thread embroidery featuring oberega (protective symbols) such as solar signs, rhombuses representing sown fields, and stylized water motifs. In 2026, while the spiritual context may have evolved for many modern sewists, the application of dense, structural embroidery at the cuffs and collar remains a vital way to honor the cultural heritage of Eastern Europe while adding immense visual striking power to the garment.
Conclusion: Preserving Heritage Through Sustainable Making
The traditional Slavic rubakha and Nordic skjorta are far more than quaint historical costumes; they are brilliant, mathematically sound solutions to the challenges of garment construction and textile waste. By embracing zero-waste geometric cutting, mastering the underarm gusset, and utilizing heritage linens, modern makers in 2026 can create deeply meaningful, highly functional clothing that respects both the environment and the ancestral artisans who perfected these techniques. Whether you are sewing for historical reenactment, cultural festivals, or simply building a sustainable, handmade wardrobe, the enduring geometry of European folk dress offers a timeless blueprint for the future of fashion.