2026 Tudor Kirtle Construction: Authentic Patterns & Fabrics
The Renaissance Revival: Tudor Dress in 2026
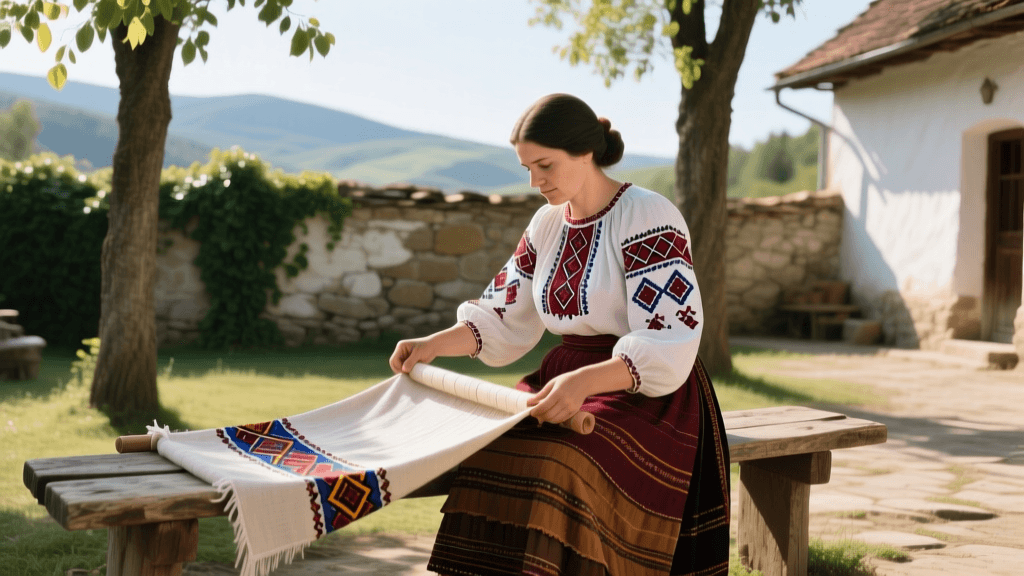
The landscape of historical dress and European folk costume reproduction has evolved dramatically over the last decade. As we navigate through 2026, the historical reenactment and costuming communities have largely moved away from theatrical, Renaissance-faire interpretations of 16th-century clothing. Today, the emphasis is firmly on material culture, archival accuracy, and authentic construction techniques. The Tudor kirtle, the foundational garment of English women's dress from the late 15th through the mid-16th century, remains a cornerstone of this revival. Whether you are preparing for a strict living history event or building a museum-quality replica, understanding the precise mechanics of kirtle construction is essential. This comprehensive 2026 guide will walk you through sourcing period-accurate textiles, selecting the right foundation materials, and executing the hand-stitching techniques that defined the era.
The Foundation Layer: The Linen Smock
Before discussing the kirtle itself, one must address the undergarment that protects it. The Tudor kirtle was never worn directly against the skin. In the 16th century, the linen smock (or shift) served as the primary barrier against body oils and sweat, protecting the expensive wool and silk outer garments from frequent washing, which would degrade the fibers and dyes. For a historically accurate 2026 build, your smock should be constructed from 100% medium-weight linen, ideally between 5.5 and 6.5 ounces per square yard. The smock should feature a simple geometric construction, utilizing rectangular body panels, square underarm gussets for mobility, and triangular gores to add flare to the skirt. The neckline should be gathered using a simple drawstring or a narrow linen band, and all seams should be felled to prevent fraying and ensure longevity during active wear.
Sourcing Period-Accurate Textiles in 2026
The most critical factor in achieving an authentic Tudor silhouette is the textile. Modern commercial wools are often heavily processed, dyed with synthetic aniline colors, and woven with a tight, uniform twill that looks distinctly modern. According to research archived by the Victoria and Albert Museum's Fashion Collections, 16th-century English broadcloths and kerseys had a distinct, slightly fulled texture with a visible nap. In 2026, heritage weaving mills in the United Kingdom and specialized historical textile vendors have vastly improved their offerings. When sourcing wool for your kirtle bodice and skirt, look for 100% wool flannel, melton, or lightly fulled broadcloth in the 12 to 16-ounce per yard range. These heavier weights provide the structural integrity needed to support the skirt's weight without relying entirely on the bodice's boning. For the lining, a tightly woven, lightweight linen (around 3.5 to 4.5 ounces) is historically appropriate and provides a smooth, breathable interior. Avoid cotton entirely; while cheap and accessible, cotton was not used for structural garment linings in Tudor England.
The Bodice Foundation: Boning Materials Compared
The Tudor kirtle bodice is a supportive garment, designed to smooth the torso and support the bust, acting as the precursor to the later, separate pair of bodies (corset). While the earliest kirtles relied heavily on stiffened linen layers and heavy wool, by the mid-16th century, boning was increasingly introduced to maintain a rigid, conical silhouette. In 2026, historical dressmakers have several options for boning, ranging from strictly authentic to modern practical alternatives. Below is a comparison of the most common materials used in contemporary historical reproduction.
| Boning Material | Authenticity Level | 2026 Avg. Cost | Pros | Cons |
|---|---|---|---|---|
| Natural Cane / Reed | High (Period Accurate) | $4 - $6 / yard | Historically accurate, breathable, molds to body heat over time. | Can snap under extreme stress, requires soaking before insertion. |
| 3D-Printed PLA | Low (Modern Innovation) | $8 - $12 / yard | Highly customizable thickness, lightweight, waterproof, consistent. | Not historically accurate, can warp if left in a hot vehicle. |
| Synthetic Whalebone | Medium (Historical Substitute) | $10 - $15 / yard | Mimics baleen flexibility, very durable, washable. | Expensive, sometimes too flexible for heavy bust support. |
| Spiral Steel | Low (Victorian Era) | $3 - $5 / yard | Extremely durable, provides rigid support, cheap. | Too flexible laterally, heavy, historically inaccurate for 16th century. |
For the most authentic 2026 build, natural reed or cane remains the gold standard. Experts at The Tudor Tailor frequently recommend reed for its period accuracy and its unique ability to mold to the wearer's body heat, creating a custom fit that synthetic materials cannot replicate. However, if you are building a garment for heavy outdoor summer festivals where moisture and sweat are a concern, synthetic whalebone offers a practical, durable compromise.
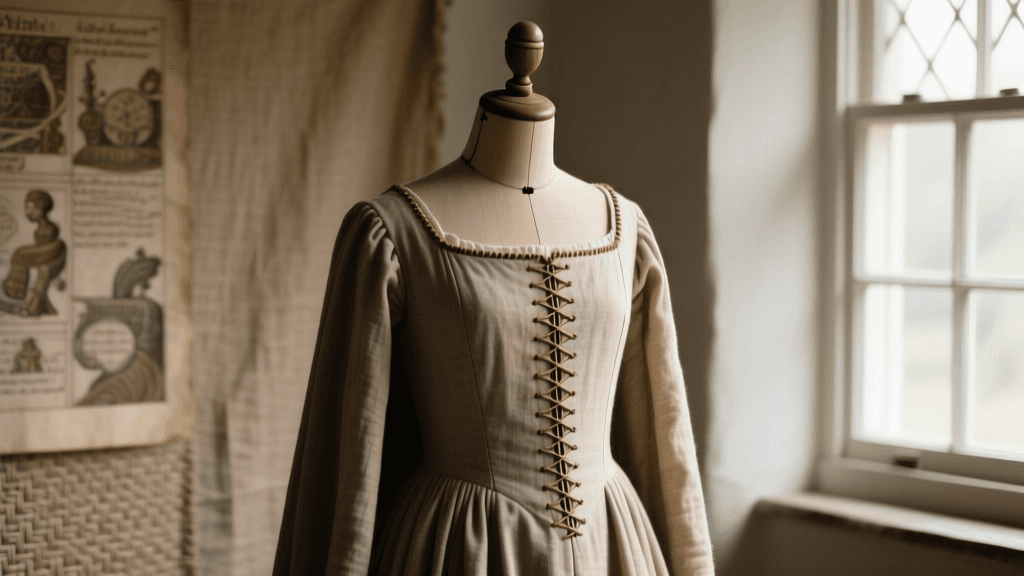
Patterning the Tudor Kirtle Bodice
Unlike modern clothing, which is drafted using complex mathematical formulas and standard sizing charts, the 16th-century kirtle bodice was primarily draped directly onto the wearer's body. To begin, you will need a sturdy linen canvas or drill cloth to create your toile (mock-up). Pin the fabric directly over the wearer's smock, ensuring the grain lines are perfectly straight. The front panels should be cut on the straight grain to prevent stretching, while the side and back panels can utilize a slight bias or be cut on the fold to accommodate the curve of the spine. The armscye (armhole) in a Tudor kirtle is cut much higher and tighter under the arm than modern patterns, which is crucial for providing bust support and preventing the garment from shifting during movement. Once the toile is pinned and the wearer can breathe and sit comfortably, mark the seam lines with a washable pen, remove the fabric, and transfer the pattern to your final wool and linen layers. Remember to add a generous seam allowance of at least one inch; 16th-century tailors relied on wide seam allowances to allow for future alterations as the wearer's body changed.
Hand-Stitching Techniques for Historical Accuracy
While the sewing machine is a marvel of modern convenience, it produces a lockstitch that is visually and structurally different from the hand-stitching of the Renaissance. To achieve true historical accuracy, the structural seams of the kirtle should be sewn by hand using a strong, waxed linen thread. The primary stitch used for long seams is the running stitch, executed with a small, even gauge of about 8 to 10 stitches per inch. For areas of high stress, such as the armscye and the waistline seam where the heavy skirt attaches to the bodice, a backstitch is mandatory. After sewing the main seams, the allowances are trimmed, folded over, and secured to the lining using a felling stitch. This technique not only encloses the raw edges, preventing fraying, but also adds a subtle layer of padding and stiffness to the bodice. Visible topstitching, such as edge finishing or decorative lines, should be done using a tightly spun silk thread, which provides a beautiful luster that linen cannot match.
Skirt Construction and Cartridge Pleating
The skirt of the Tudor kirtle is where the garment truly gains its iconic volume and presence. To achieve the distinct, bell-shaped silhouette that characterizes mid-16th-century English dress, the skirt must be heavily pleated. The most historically accurate method for gathering the massive amount of fabric into the relatively small waistline of the bodice is cartridge pleating, also known in the period as gauging. Begin by cutting your wool skirt panels to achieve a total circumference of at least three to four times the wearer's waist measurement. Hem the bottom edge with a wide, deep facing (up to six inches) to add weight and help the skirt drape beautifully. To create the pleats, mark parallel lines across the top edge of the skirt, about half an inch apart. Using a heavy, waxed linen thread, sew two or three rows of running stitches along these lines. Pull the threads tightly to gather the fabric into dense, tube-like pleats that stand out perpendicular to the waistband. These pleats are then individually whip-stitched to the bottom edge of the finished bodice, creating a remarkably strong join that can support the weight of heavy wool and additional petticoats without tearing.
Final Assembly, Edge Finishing, and Lacing
The final step in constructing your Tudor kirtle is finishing the edges and installing the closure. The front of the kirtle bodice typically closes with lacing. While metal eyelets are a common shortcut in modern costuming, they are entirely inappropriate for a 16th-century garment. Instead, you must hand-work your eyelets using a stout brass or bone awl to gently push the fibers apart, followed by stitching around the hole with a heavy linen thread using a buttonhole stitch or a tight whipstitch. This method ensures the structural integrity of the wool is maintained, as the fibers are displaced rather than cut. The lacing itself should be a sturdy, finger-loop braided linen cord or a narrow woven silk tape. Finally, bind the neckline and armscyes with a narrow strip of linen tape or silk bias binding to protect the edges from wear. By adhering to these meticulous, historically documented techniques, your 2026 Tudor kirtle will not only look authentic but will behave, drape, and endure exactly as it did over four centuries ago. For further visual references and extant garment studies, the Metropolitan Museum of Art's Costume Institute remains an invaluable digital resource for analyzing the surviving textile fragments and tailoring details of the European Renaissance.