Crafting a 16th-Century Tudor Kirtle: 2026 Fabric Guide
Introduction to the Tudor Kirtle in 2026
As historical reenactment, Renaissance festivals, and living history events continue to surge in global popularity throughout 2026, the demand for impeccable, museum-quality garment construction has never been higher. Among the most iconic and foundational garments of the 16th century is the Tudor kirtle. Worn by women across various social strata from the 1530s through the 1580s, the kirtle served as both a supportive undergarment and a visible outer dress, depending on the wearer's class and the addition of overgowns. For modern historical dressmakers, recreating this garment requires a deep understanding of period-accurate tailoring, structural engineering, and textile sourcing. This comprehensive 2026 guide will walk you through the anatomy of the Tudor kirtle, provide an updated cost analysis for historically accurate fabrics, and detail the essential techniques for bodice stiffening and cartridge pleating.
Anatomy of the 16th-Century Kirtle
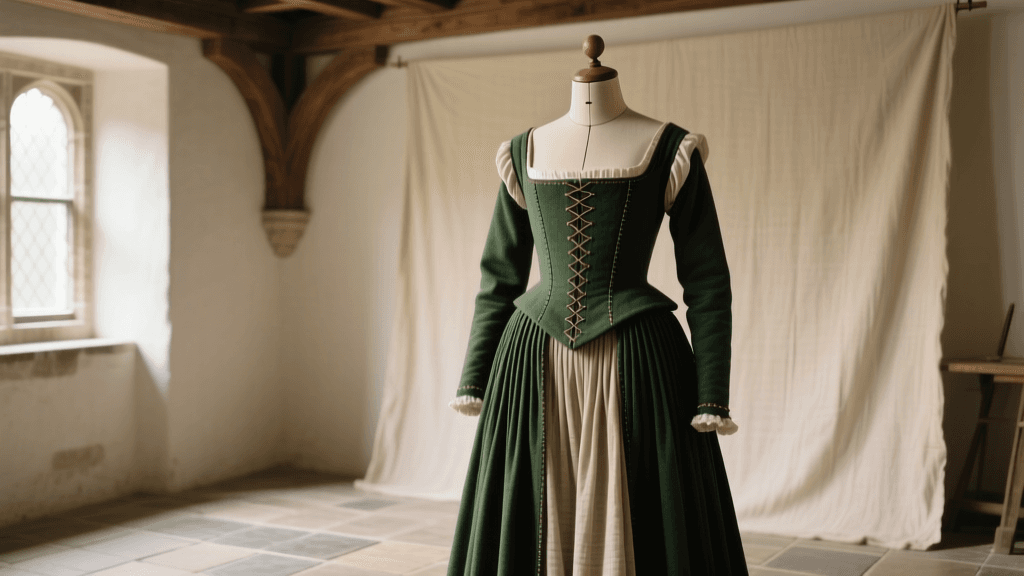
Before diving into construction, it is vital to understand the structural components of the kirtle. Unlike the heavily boned corsets of the 18th and 19th centuries, the Tudor kirtle achieved its conical, flat-fronted silhouette through stiffened interlinings and strategic seam placement. According to the extensive research compiled by The Tudor Tailor, the garment typically consisted of three main parts: a fitted, sleeveless (or short-sleeved) bodice, a full skirt attached at the natural waist, and optional detachable sleeves. The bodice was designed to support the bust and smooth the torso, while the skirt provided the necessary volume to achieve the fashionable bell shape of the era, often supported by a farthingale or petticoat underneath. The front of the kirtle bodice was usually left open to reveal a decorative forepart, or it laced closed and was hidden beneath a gown.
2026 Fabric Sourcing & Cost Comparison
Securing historically accurate textiles remains one of the most critical steps in garment reconstruction. In 2026, the artisan textile market has seen a stabilization in the pricing of natural fibers, though authentic, naturally dyed wools and high-quality linens still command a premium. When sourcing materials, reenactors must prioritize weight, drape, and fiber content over modern conveniences. The Victoria and Albert Museum Fashion Collections emphasizes that surviving 16th-century garments were predominantly constructed from wool, linen, and silk, with cotton being virtually nonexistent in Northern European dress of this period.
Below is a 2026 market comparison for the most commonly used fabrics in Tudor kirtle construction, based on current pricing from premier historical textile vendors like the Burnley & Trowbridge Company and other specialized mills.
| Fabric Type | Historical Use & Weight | 2026 Avg. Cost (Per Yard) | Recommended Sourcing |
|---|---|---|---|
| Wool Flannel (Medium) | Outer skirt and bodice; excellent drape and warmth. | $38.00 - $45.00 | Burnley & Trowbridge |
| Heavyweight Linen (7-9 oz) | Bodice lining, interlining, and smock layers. | $22.00 - $28.00 | Fabrics-Store.com |
| Wool Broadcloth | High-status outer bodices; takes embroidery well. | $55.00 - $70.00 | Wm. Booth Draper |
| Silk Taffeta | Upper-class visible skirts, sleeves, and trim. | $40.00 - $60.00 | Renaissance Fabrics |
Bodice Construction and Historical Stiffening
The secret to the iconic Tudor silhouette lies in the bodice's interlining. Modern dressmakers often make the mistake of using modern steel boning, which creates an unnatural, rigid tube rather than the smooth, molded cone characteristic of the 16th century. Historically, bodices were stiffened using layers of heavyweight linen glued or pasted together to create buckram, or by inserting bundles of bents (a type of stiff marsh grass) or whalebone into channels.
For the 2026 historical dressmaker, creating authentic buckram is highly recommended for the most accurate result. You can construct your own by painting layers of heavy linen with a mixture of hide glue or modern, flexible fabric stiffeners, allowing them to cure under weight. If you prefer a modern, breathable alternative that mimics the flexibility of historical reeds, German plastic boning (synthetic whalebone) is the premier choice in 2026. It can be molded with heat, breathes better than steel, and provides the gentle, distributed support necessary for a historically accurate conical torso. When patterning the bodice, always drape on a dress form or the wearer while wearing the foundational linen smock, ensuring the armscye is cut high and tight under the arm to provide maximum bust support.
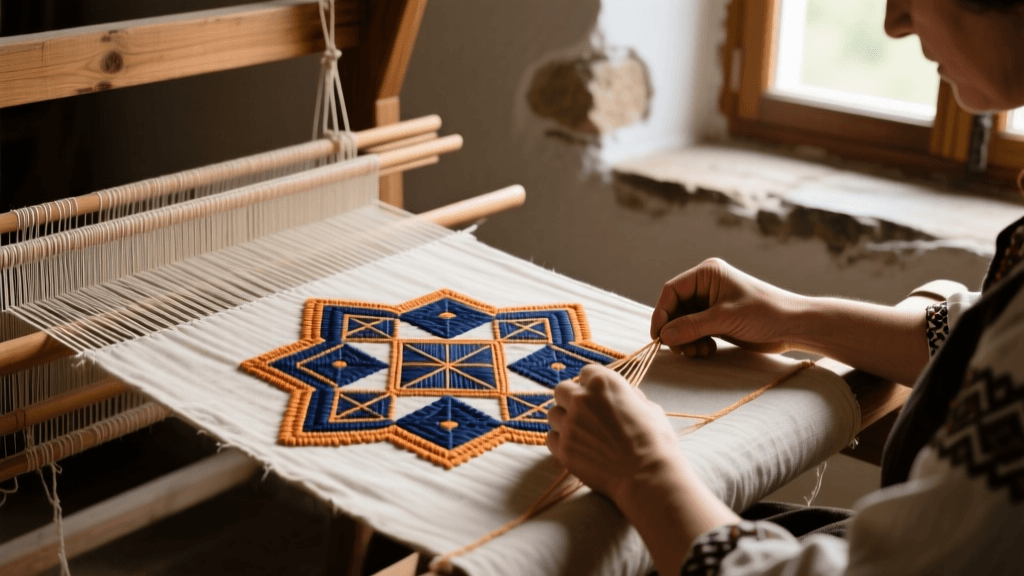
Mastering the Art of Cartridge Pleating
Attaching the voluminous skirt to the fitted bodice requires cartridge pleating, a technique that allows a massive amount of fabric to be gathered into a very small waistline without adding bulk. This technique is non-negotiable for an authentic Tudor kirtle. To begin, you will need between 3.5 to 5 yards of fabric, depending on your waist measurement and desired fullness.
- Prepare the Skirt Top: Fold over the top edge of your skirt fabric by about two inches to create a reinforced header. This extra layer of fabric will take the strain of the heavy pleats.
- Mark the Pleats: Using a ruler and a water-soluble pen, mark parallel rows of dots along the wrong side of the reinforced header. For a heavy wool skirt, space the dots 1/2 inch apart vertically and 1/2 inch apart horizontally. For lighter silks or linens, you can reduce the spacing to 1/4 inch.
- Run the Gathering Threads: Using a strong, waxed linen thread, run a running stitch through each row of dots. Ensure your stitches are perfectly aligned vertically, as this dictates the neatness of the final pleats.
- Pull and Secure: Gently pull the threads to draw the fabric up into tight, accordion-like folds. Wrap the threads securely around a pin in a figure-eight pattern to hold the tension.
- Attach to the Bodice: Fold the pleated edge of the skirt down at a 90-degree angle to the skirt body. Whipstitch the top folded edge of each individual pleat directly to the finished bottom edge of your bodice. This creates a hinge effect, allowing the skirt to fall gracefully outward over the hips and farthingale.
Finishing Details: Eyelets, Lacing, and Sleeves
The final stages of kirtle construction involve the closure mechanism and sleeve attachment. While hooks and eyes were used in the late 16th century for some gowns, the primary closure for the Tudor kirtle bodice was spiral lacing. In 2026, hand-bound eyelets remain the gold standard for historical accuracy and garment longevity. Do not use modern metal grommets, as they will tear through the fabric under the high tension of bodice lacing. Instead, use a metal awl to gently push the fabric threads apart, creating a small hole, and then sew around the perimeter using a tight buttonhole stitch with heavy linen or silk buttonhole twist.
Space your eyelets approximately one inch apart, alternating sides for spiral lacing, which provides a more even and secure closure than straight ladder lacing. Finally, if your design includes sleeves, they should be constructed as separate pieces, often tied or pinned to the bodice's shoulder straps using silk ribbons or metal aglets, allowing the wearer to swap out heavier winter sleeves for lighter, slashed silk sleeves during the warmer months of the festival season. By adhering to these historically grounded techniques and utilizing the best materials available on the market today, your 16th-century Tudor kirtle will not only look spectacular but will withstand the rigors of modern historical interpretation for years to come.