How to Tie a Nagoya Obi: Otaiko Musubi Step-by-Step
The Art of the Otaiko Musubi: An Introduction
The Otaiko Musubi, translating to "drum knot," is arguably the most recognizable and culturally significant obi tie in Japanese traditional dress. According to the Metropolitan Museum of Art, the evolution of the obi from a simple narrow sash in the Edo period to a wide, heavily brocaded centerpiece of the kimono ensemble necessitated complex tying techniques. The Otaiko Musubi emerged during the late Edo and early Meiji periods, favored for its elegant, flat back panel that resembles the surface of a traditional Japanese drum. Today, it remains the standard semi-formal to formal knot for married women, or for unmarried women attending subdued, elegant events.
While the Victoria and Albert Museum notes that kimono silhouettes have shifted dramatically over centuries, the structural integrity of the Otaiko Musubi has remained remarkably consistent. This tutorial focuses specifically on tying the Otaiko Musubi using a Nagoya obi. The Nagoya obi is a brilliant innovation from the 1920s, pre-folded and stitched to reduce the bulk and complexity of the traditional Fukuro obi, making it the perfect canvas for both beginners and seasoned kitsuke (kimono dressing) practitioners.
Essential Accessories for the Perfect Knot
Before beginning, you must gather the correct dressing accessories. The structural beauty of the Otaiko Musubi relies heavily on hidden supports. Attempting to tie this knot without the proper internal scaffolding will result in a sagging, unstructured back panel.
| Accessory | Purpose | Standard Dimensions | Average Cost (USD) |
|---|---|---|---|
| Obi-ita (Front Board) | Prevents wrinkling at the front wrap | 45cm x 15cm (Felt/Plastic) | $10 - $25 |
| Obi-makura (Pillow) | Creates the voluminous drum shape | 20cm x 10cm (Cotton/Polyurethane) | $8 - $15 |
| Obi-age (Sash) | Covers the pillow and adds color | 120cm x 30cm (Silk/Chirimen) | $20 - $80 |
| Obi-jime (Cord) | Secures the center of the knot | 150cm length (Braided Silk) | $15 - $60 |
| Koshi-himo (Tie) | Temporary securing during dressing | 100cm x 5cm (Cotton/Muslin) | $5 - $12 |
Ensure your koshi-himo are made of a textured cotton or muslin blend; slippery silk ties will loosen as you move, compromising the entire structure.
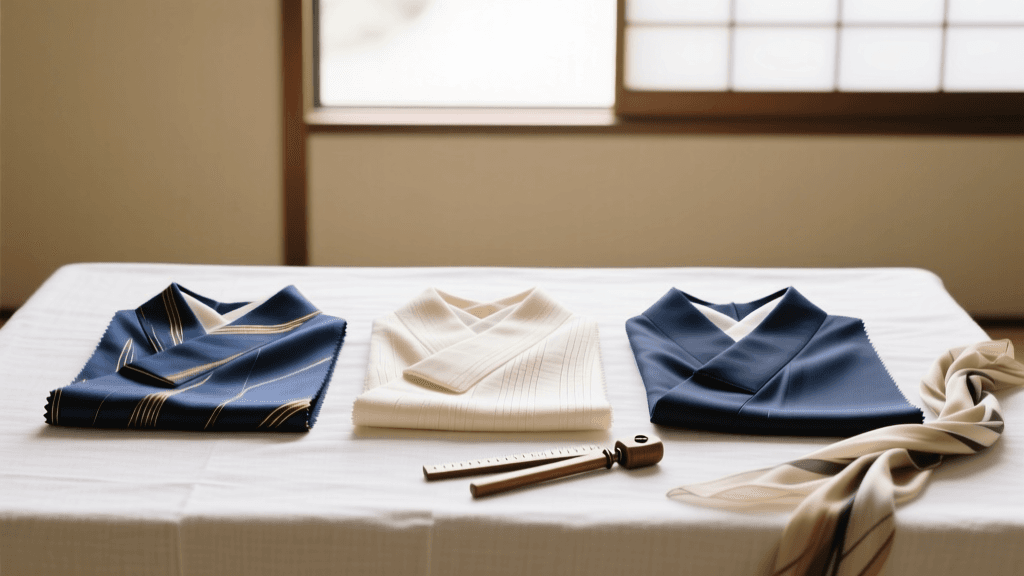
Anatomy and Preparation of the Nagoya Obi
Understanding the anatomy of the Nagoya obi is crucial. Unlike the uniform width of a Hanhaba or Fukuro obi, the Nagoya obi features a te-saki (the narrow, pre-folded end used for wrapping the waist) and a tare-saki (the wide, unfolded end that forms the decorative drum panel). The standard length of a Nagoya obi is approximately 315 to 320 centimeters, with the wide section measuring about 30 centimeters across.
Preparation Step: Locate the te-saki. If your obi is not permanently stitched, fold it in half lengthwise so the wrong sides face inward. The tare-saki remains fully open and flat. Place the obi-makura (pillow) inside a protective cover, and thread your obi-age (sash) through the pillow, tying it loosely around your waist so it hangs at your back, ready for use.
Step-by-Step Guide to Tying the Otaiko Musubi
Step 1: The Initial Wrap and Front Board
Begin by placing the center of the obi-ita (front board) against your stomach, over your kimono. Take the narrow te-saki end of the obi and wrap it around your waist from front to back, keeping the bottom edge aligned precisely with your hip bone. Bring it back to the front and wrap it a second time. The tension here is critical: pull firmly with your left hand while guiding the fabric with your right. The bottom edge must be skin-tight against the hips, while the top edge can be slightly looser to accommodate breathing and movement.
Step 2: Crossing and Securing the Base
Once you have completed two full wraps, you will be at the front of your body. Take the wide tare-saki end (which has been hanging down your back or draped over your shoulder) and bring it to the front. Cross the wide tare-saki over the top of the narrow te-saki. Grab both layers securely and pull them tight against your right hip. Use a koshi-himo (temporary tie) to bind both layers securely at the center front, just below the navel. Tuck the excess koshi-himo fabric away so it does not create bulk.
Step 3: Forming the Drum (Otaiko)
Turn your body so you can access your back. Take the wide tare-saki and pull it upward to your desired height. For a mature, elegant look, the top of the drum should sit just below the shoulder blades. Insert the obi-makura (pillow) into the fold of the wide end, pushing it upward to create a taut, rounded shelf. Drape the wide fabric down over the pillow, ensuring the pattern is centered and the fabric is pulled completely smooth without any diagonal wrinkles. This flat, draped section is the "drum" or otaiko.
Step 4: Securing the Panel
While holding the draped panel taut with one hand, take a second koshi-himo and tie it tightly around the very top edge of the obi-makura, securing the drum to your back. Next, take the narrow te-saki end (which is currently wrapped around your waist) and pull it up and over the exact center of the drum panel. This narrow band acts as the decorative "string" of the drum. Pin it temporarily with a small clip or hold it in place as you prepare the final cord.
Step 5: The Obi-jime and Obi-age
Take your obi-jime (braided cord) and thread it through the center of the drum, directly over the narrow te-saki band. Bring it to the front, cross it, and tie a secure, flat square knot (hon-musubi) at the center of your stomach. Tuck the tassels or ends neatly into the sides of the knot. Finally, take the obi-age (sash) that has been waiting at your back, pull it up to cover the top edge of the obi-makura, and bring it to the front. Tie it in a neat, semi-hidden knot at the center front, tucking the excess fabric down into the top of the obi wrap. According to dressing guidelines featured on Japan Guide, the obi-age should only peek out slightly (about 1 to 2 centimeters) for married women, while unmarried women may show a slightly thicker band.
Troubleshooting Common Mistakes
- The Sagging Drum: This occurs when the obi-makura is too small or the koshi-himo at the top of the pillow is not tied tightly enough. Ensure your pillow is firm and the temporary tie is knotted securely against the spine.
- Diagonal Wrinkles on the Panel: When draping the tare-saki over the pillow, you must pull the fabric straight down. If you pull it at an angle, the brocade pattern will distort. Use a specialized kimono clip to hold the fabric taut while you tie the upper koshi-himo.
- Front Gap (Kimono Collar Pulling): If the obi is tied too high or too tightly at the top edge, it will drag the kimono collar backward, exposing the nape of the neck uncomfortably. Always anchor the bottom edge of the obi firmly to the hip bone to distribute the tension downward.
Cultural Etiquette and Modern Styling
The Otaiko Musubi is deeply rooted in Japanese sartorial etiquette. As noted by cultural historians, the flat back of the knot was originally designed to allow women to sit comfortably against walls or in traditional tatami rooms without the bulky protrusion of a bow. Today, this practical design translates beautifully into modern settings, allowing the wearer to sit in Western-style chairs or ride public transit without damaging the delicate silk textiles.
"The beauty of the kimono lies not just in the textile, but in the architectural precision of how it is worn. The obi is the keystone of that architecture."
When selecting a Nagoya obi for the Otaiko Musubi, pay close attention to the formality of the pattern. A Nagoya obi with a continuous, all-over pattern (tsuke-gara) is suitable for casual outings and tea practice. However, for semi-formal events like weddings or graduation ceremonies, choose a Nagoya obi with an embroidered or woven focal pattern that sits precisely on the otaiko panel and the front wrap. Mastering this knot takes patience and muscle memory, but the result is a timeless silhouette that honors centuries of Asian textile tradition.