Kimono Layering Guide: Essential Undergarments & Kitsuke Basics
The Foundation of Elegance: Understanding Kimono Layering
The art of wearing a kimono, known as kitsuke, is far more complex than simply slipping on a robe. It is a meticulous, multi-layered process that transforms the human body into a graceful, cylindrical silhouette. While the outer kimono and the obi sash capture the public's imagination, the true foundation of this iconic garment lies in its undergarments. According to cultural resources highlighted by the Japan National Tourism Organization, traditional Japanese attire is deeply rooted in seasonal awareness, modesty, and the preservation of precious textiles. Layering serves all three of these vital purposes.
Proper layering protects expensive silk outerwear from sweat and body oils, provides necessary warmth during winter, and allows for subtle flashes of color and pattern at the collar and hem. For beginners and seasoned enthusiasts alike, mastering the undergarments is the most critical step in achieving a flawless, comfortable kimono silhouette. This comprehensive guide breaks down the anatomy of kimono undergarments, provides actionable measurement tips, and outlines the step-by-step layering process.
The Anatomy of Kimono Undergarments
1. Hadajuban (The Skin Layer)
The hadajuban is the innermost layer, worn directly against the skin. It is typically a thin, short-sleeved top made from breathable cotton, bamboo, or moisture-wicking synthetic blends. Its primary purpose is to absorb sweat and protect the more delicate layers above it. Because it touches the skin, the hadajuban is easily machine-washable. Modern innovations include cooling mesh fabrics for summer and thermal-lined cotton for winter. A standard cotton hadajuban costs between $20 and $45, making it an affordable and essential investment for any kimono wardrobe.
2. Susoyoke and Koshimaki (The Lower Layers)
For the lower half of the body, wearers utilize either a susoyoke (a wrap-around skirt) or a koshimaki (a fuller, gathered skirt). The susoyoke is typically made of silk or synthetic crepe and is worn in formal settings to allow the legs to glide smoothly against the kimono lining. The koshimaki, often made of cotton or flannel, provides more volume and warmth, making it ideal for casual wear or colder months. Both garments tie securely at the waist and prevent the outer kimono from clinging to the legs during movement.
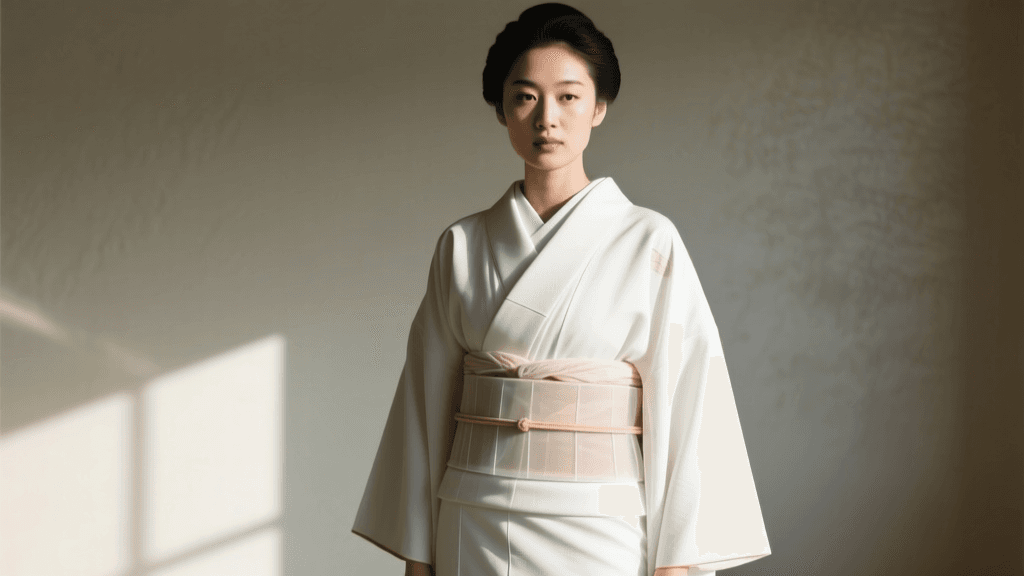
3. Nagajuban (The Inner Kimono)
The nagajuban is the most crucial undergarment in the layering system. It is a full-length robe worn over the hadajuban and susoyoke. While mostly hidden, the eri (collar) of the nagajuban is intentionally left visible beneath the outer kimono's collar, adding a vital layer of depth and contrasting color. Historically, as noted in the archives of the Victoria and Albert Museum's Kimono exhibition, the layering of collars was a subtle way for merchants in the Edo period to display wealth and taste when sumptuary laws restricted overt displays of luxury.
Today, nagajuban are available in silk (for formal wear), polyester (for easy care), and cotton (for yukata or casual wear). They often feature interchangeable collars (han-eri), which can be heavily embroidered and swapped out to match the season or the outer kimono's color palette.
4. Datejime and Koshihimo (The Ties)
To secure these layers, specific ties are used. Koshihimo are thin, long cotton or silk cords used to tie the nagajuban and outer kimono at the waist and hips. Datejime are wider, stiffer sashes (often made of elastic, silk, or velcro) tied over the koshihimo to flatten the fabric, prevent bunching, and create the smooth, cylindrical shape required for the obi to sit perfectly.
Comparison Chart: Essential Kimono Undergarments
| Garment Name | Primary Purpose | Typical Material | Average Cost (USD) | Seasonality |
|---|---|---|---|---|
| Hadajuban | Sweat absorption, skin protection | Cotton, Bamboo, Synthetic | $20 - $45 | All Year (Mesh for Summer) |
| Susoyoke | Leg glide, formal lower layer | Silk, Synthetic Crepe | $30 - $80 | All Year |
| Koshimaki | Warmth, volume, casual lower layer | Cotton, Flannel | $25 - $50 | Autumn, Winter |
| Nagajuban | Collar display, kimono protection | Silk, Polyester, Cotton | $60 - $250+ | All Year (Weight varies) |
| Han-eri | Decorative interchangeable collar | Silk, Crepe, Embroidered | $15 - $100 | Seasonal Motifs |
| Koshihimo | Securing layers at waist and hips | Cotton, Silk, Nylon | $5 - $15 (each) | All Year |
| Datejime | Flattening fabric, smoothing silhouette | Elastic, Silk, Velcro | $10 - $30 | All Year |
Step-by-Step Layering Guide: The Kitsuke Process
Dressing in a kimono takes practice. A beginner might take 45 minutes to an hour, while a licensed kitsuke instructor can complete the process in under 15 minutes. Follow this foundational order to ensure a smooth finish:
- Prep the Skin: Put on the hadajuban. Ensure the back of the neck is exposed by pulling the collar back slightly. Tie the susoyoke or koshimaki securely around your natural waist.
- Don the Nagajuban: Slip your arms into the nagajuban. Align the back seam (se-ushiro) perfectly with the center of your spine.
- Adjust the Collar (Eri): Cross the left side over the right (the right-over-left style is strictly reserved for dressing the deceased). Pull the collar snugly at the front, leaving a fist-sized gap at the back of the neck (eri-nuki).
- Secure the Waist: Take your first koshihimo and tie it firmly just below the bust (for women) or at the hips (for men) to secure the nagajuban.
- Smooth and Flatten: Wrap the datejime over the koshihimo. This compresses the bust and stomach area, creating a flat canvas.
- Prepare for the Outer Kimono: Put on the outer kimono, matching the back seams. Adjust the hemline to the desired length (usually grazing the ankle for women) and tie with a second koshihimo.
- Final Adjustments: Use a specialized tool called an eri-shin (collar stay) inserted into the nagajuban collar to keep it crisp and perfectly shaped throughout the day.
Sizing, Measurements, and Practical Tips
Unlike Western clothing, kimono and their undergarments are largely one-size-fits-most, relying on the folding and tying techniques of kitsuke to accommodate different body types. However, when purchasing a nagajuban, you must pay attention to two critical measurements:
- Mitake (Back Length): This is measured from the base of the neck (the prominent vertebra) down to the ankle. A standard women's mitake is around 120cm to 130cm. If the nagajuban is too long, it will bunch under the obi; if too short, it will peek out awkwardly beneath the outer kimono.
- Yuki (Sleeve Length): Measured from the center back of the neck, across the shoulder, and down to the wrist. The nagajuban sleeves must be slightly shorter than the outer kimono sleeves so they remain hidden.
Pro Tip: If you are between sizes or have a broader back, opt for a nagajuban with a wider okumi (front overlap panel). This ensures the collar crosses comfortably without pulling or gaping.
Caring for Your Undergarments
Proper maintenance extends the life of your garments and protects your investment in outerwear. Textile conservation experts, such as those at The Metropolitan Museum of Art's textile department, emphasize the importance of climate control and proper cleaning for layered historical garments. While you may not be preserving museum artifacts, the principles apply to your personal collection.
- Hadajuban and Koshimaki: These should be washed after every use. Use a gentle detergent and cold water. Air dry to prevent shrinkage.
- Synthetic Nagajuban: Most modern polyester nagajuban can be hand-washed or machine-washed on a delicate cycle inside a mesh laundry bag. Hang to dry and iron on a low synthetic setting.
- Silk Nagajuban and Susoyoke: Never wash these at home. Take them to a dry cleaner who specializes in traditional Japanese garments (arai-hari services). Alternatively, spot clean the collar and underarm areas with a damp cloth and specialized silk cleaner.
- Han-eri (Collars): Unstitch the collar after wearing, wash it gently, iron it flat, and reattach it for the next wear. This prevents sweat stains from setting into the silk.
Conclusion
Mastering kimono undergarments and the basics of layering is a rewarding journey into the heart of Japanese sartorial culture. By understanding the specific roles of the hadajuban, susoyoke, and nagajuban, you not only protect your valuable outerwear but also achieve the elegant, seamless silhouette that defines the kimono. Whether you are dressing for a formal tea ceremony, a summer festival, or simply practicing the meditative art of kitsuke at home, a solid foundation is the key to wearing the kimono with confidence and grace.