Mastering Kimono Layering: A Seasonal Guide to Kitsuke
Introduction to Kitsuke and Seasonal Awareness
The art of wearing the kimono, known as kitsuke, is far more than simply wrapping fabric around the body. It is a highly structured discipline that harmonizes the wearer with the natural world. In Japanese culture, the concept of kisetsukan (seasonal feeling) dictates not only the motifs embroidered onto the silk but also the physical weight, weave, and layering of the garments. To dress correctly is to anticipate the shifting climate, often transitioning your wardrobe a full month before the meteorological season actually changes.
As noted by the Metropolitan Museum of Art, the evolution of the kimono from a simple undergarment in the Heian period to the complex, layered outer robe of the Edo period was deeply intertwined with Japan's agrarian calendar and strict sumptuary laws. Today, mastering seasonal kitsuke requires an understanding of base layers, precise measurements, and specialized dressing techniques tailored to extreme weather.
The Foundation: Undergarments and Base Layers
Before the outer kimono is even touched, the foundation must be laid. The base layers protect the expensive outer silk from sweat and body oils while providing the necessary padding to create the ideal cylindrical silhouette.
- Hadajuban and Susoyoke: The innermost layer. The hadajuban (under-shirt) and susoyoke (half-slip) are typically made of breathable cotton or moisture-wicking synthetic blends. A modern synthetic set costs between $20 and $40.
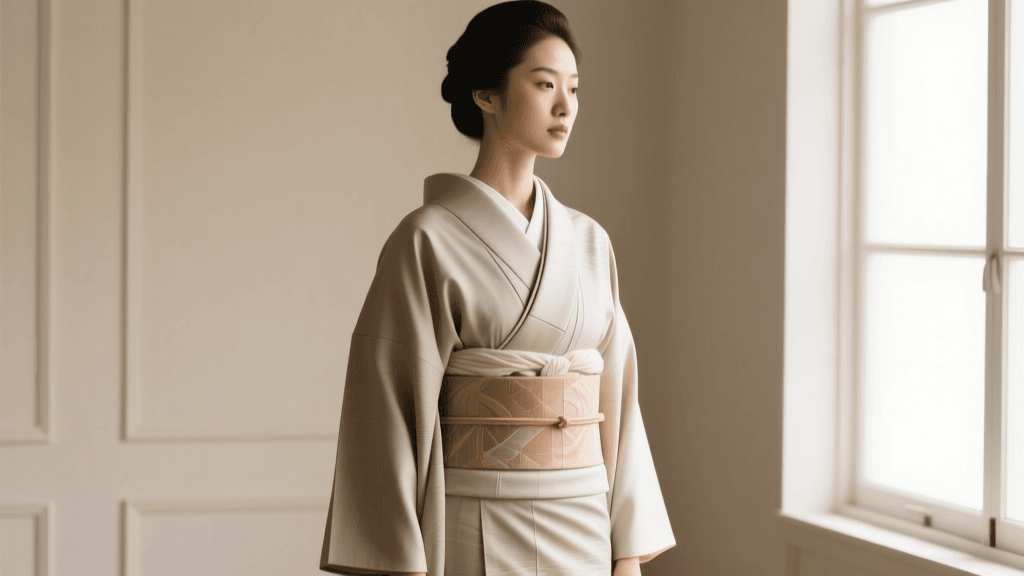
- Nagajuban: The long under-robe. This layer features the han-eri (half-collar), which is the only part of the undergarment visible at the neckline. In winter, the han-eri might be heavy silk with intricate embroidery. In summer, it is swapped for sheer ro or sha woven silk. A quality synthetic nagajuban costs around $50, while vintage silk versions can range from $80 to $150.
- Padding: To achieve the traditional straight, column-like shape, practitioners use kimono bras and hip pads (costing $15–$30) to minimize the bust and fill in the curve of the lower back.
Seasonal Kimono Selection: Awase, Hitoe, and Usuyori
The most critical rule of seasonal wear is selecting the correct kimono construction. The Victoria and Albert Museum emphasizes that the structural integrity and lining of the kimono are just as important as the surface design when conveying seasonal awareness.
| Season | Months | Kimono Type | Lining | Fabric Examples |
|---|---|---|---|---|
| Winter / Spring / Autumn | October – May | Awase | Fully Lined | Silk chirimen (crepe), wool, polyester |
| Early Summer / Autumn | June & September | Hitoe | Unlined | Silk tsumugi, cotton, linen blends |
| Mid-Summer | July & August | Usuyori / Ro | Unlined (Sheer) | Silk ro, sha, hemp (jofu) |
Timing Rule of Thumb: You switch to the unlined hitoe on June 1st, and to the sheer ro on July 1st. However, due to modern climate change and Japan's intense rainy season (tsuyu), many contemporary practitioners delay the switch to sheer fabrics until after the rainy season ends in mid-July to avoid the chill of damp air.
Actionable Dressing Techniques for Extreme Weather
Summer Cooling Techniques (July - August)
Dressing in a traditional kimono during the humid Japanese summer requires strategic airflow management. 1. The Chimney Effect: When tying the first koshi-himo (waist tie, $5–$10 each), tie it just snug enough to hold the garment, but leave a slight gap at the front. This allows body heat to rise and escape through the wide sleeve openings. 2. Sweat Guards: Attach disposable or washable ase-kaki (sweat pads) to the underarms of the nagajuban. These cost roughly $10 for a multi-pack and save delicate silk from permanent staining. 3. Collar Tension: Pull the back collar slightly lower than in winter (showing about 3-4 fingers of space between the neck and the collar) to expose the nape to cooling breezes.
Winter Layering and Insulation (December - February)
Winter kitsuke focuses on trapping heat without adding bulk that ruins the silhouette. 1. The Hiyoku Effect: For formal winter events, a secondary, slightly smaller collar layer called a hiyoku is worn beneath the main kimono to simulate the warmth and luxury of multiple layers without the physical weight. 2. Outerwear: A haori (hip-length jacket) is added for informal outdoor transit, while a michiyuki (three-crested coat with a square neckline) is worn over the kimono for formal visits. 3. Footwear: Swap standard cotton tabi for thermal-lined or fleece tabi socks ($25–$40). Place disposable toe-warmers inside the zori sandals before stepping outside.
The Obi: Seasonal Fabrics and Knots
The obi is the anchor of the kitsuke process. In winter, heavy, stiff brocade maru or fukuro obi are preferred, providing structural warmth and a formal aesthetic. Tying these requires an obi-ita (front board, $10–$20) and an obi-makura (back pillow, $10) to maintain the crisp shape of knots like the niju-daiko (double drum knot).
In summer, the heavy brocade is swapped for a sheer ra or sha woven obi, or a lightweight cotton hanhaba obi for casual yukata wear. The tension must be adjusted carefully; a sheer obi pulled too tightly will warp and tear, while pulling it too loosely will cause the entire garment to slip.
Sizing Guide and Essential Measurements
Unlike Western clothing, kimono are sold based on specific traditional measurements rather than standard S/M/L sizing. When purchasing or tailoring a kimono for seasonal wear, you must verify the following:
- Yuki (Sleeve Length): Measured from the center back of the neck, over the shoulder, down to the wrist bone. The modern standard for women is typically 130cm to 135cm. If the yuki is too short, the wrist will show (considered informal and improper for winter); if too long, the sleeves will drag.
- Migoro (Body Width): The width of the main body panels. A standard vintage kimono has a migoro of about 32cm to 34cm per panel, accommodating a hip measurement of up to 100cm. Modern, wider kimono are available for larger frames.
- Take (Total Length): Measured from the base of the neck to the ankle. The kimono must be long enough to create the ohashori (the waist fold), which should sit perfectly level and hide the waist ties beneath it.
Essential Kitsuke Toolkit and Costs
To begin your seasonal kitsuke journey, assemble the following toolkit. Investing in high-quality tools ensures the garment stays secure and comfortable throughout the day.
- Koshi-himo (Waist Ties): 4 to 5 pieces. Silk or soft cotton. Cost: $8–$15 each.
- Date-jime (Under-Obi Sash): 1 to 2 pieces. Used to secure the kimono before the obi is applied. Cost: $15–$30.
- Obi-ita (Obi Board): 1 piece. Prevents the obi from wrinkling at the front. Cost: $10–$20.
- Obi-age (Obi Scarf): 1 piece. A decorative silk sash that peeks out above the obi. Summer versions are sheer; winter versions are heavily dyed silk. Cost: $20–$60.
- Obi-jime (Obi Cord): 1 piece. A braided cord that secures the knot. Cost: $15–$50.
Conclusion
Mastering the seasonal wear and dressing techniques of the kimono is a lifelong pursuit of elegance, discipline, and respect for nature. By understanding the structural differences between awase, hitoe, and ro garments, and by employing strategic layering and tension techniques, you can wear traditional Japanese garments comfortably and correctly year-round. Whether you are navigating the sweltering humidity of a Kyoto August or the crisp, biting winds of a Tokyo January, the principles of kitsuke ensure you remain both culturally authentic and physically at ease.