Kimono Undergarments & Layering: The Hidden Architecture
The Foundation of the Silhouette
When most people envision a traditional Japanese kimono, they immediately picture the vibrant silk, intricate dyeing techniques, and sweeping sleeves of the outer garment. However, the true elegance and structural integrity of the kimono are built from the inside out. Unlike Western fashion, which traditionally seeks to accentuate the body's natural curves, the ideal kimono silhouette is cylindrical, straight, and seamless. Achieving this refined, column-like shape requires a meticulous system of undergarments, padding, and layering.
Understanding kimono undergarments is not just a matter of historical trivia; it is a practical necessity for anyone looking to wear the garment correctly, comfortably, and respectfully. The layering system protects the expensive outer silk from sweat and body oils, provides warmth or cooling depending on the season, and creates the flawless canvas required for the outer kimono to drape perfectly. In this comprehensive guide, we will explore the hidden architecture of the kimono, detailing every essential layer, seasonal variations, and the step-by-step process of achieving the perfect traditional silhouette.
Essential Kimono Undergarments Explained
The kimono dressing process, known as kitsuke, involves several distinct layers. Each piece serves a specific functional and aesthetic purpose, working together to ensure the outer garment sits flawlessly on the body.
Hadajuban and Susoyoke (The Base Layer)
The foundation begins directly against the skin with the hadajuban (a short, thin undershirt) and the susoyoke (a wrap skirt). Alternatively, modern wearers often use a one-piece slip called a hadagi, which combines both elements for convenience. These base layers are typically made from breathable cotton, linen, or moisture-wicking synthetic blends. Their primary purpose is to absorb perspiration and protect the more delicate layers above from skin oils. A high-quality cotton hadajuban and susoyoke set generally costs between $30 and $60 USD and is machine washable, making it a practical investment for frequent wearers.
Wafuku Pads and Towels (Shape Control)
To achieve the traditional cylindrical silhouette, the body's natural curves must be gently minimized. This is where wafuku (Japanese clothing) padding comes into play:
- Wafuku Bra: Unlike Western push-up bras, a wafuku bra is designed to flatten the bust, preventing the outer kimono from pulling awkwardly across the chest.
- Hip Pads (Shiri-ate): Wrapped around the hips, these padded belts fill in the natural dip of the waist and create a straight line from the ribs to the thighs.
- Waist Towels (Koshi-himo towels): Small, specially designed cotton towels are tied around the waist to fill in the small of the back, ensuring the obi (sash) sits perfectly flat and secure without digging into the spine.
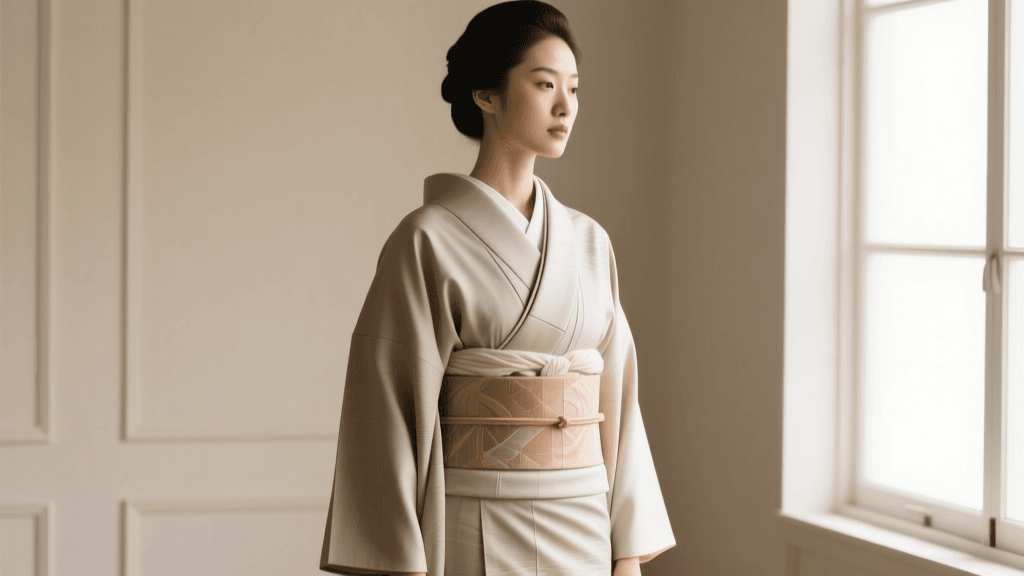
Nagajuban (The Under-Kimono)
The nagajuban is the main under-kimono, worn over the base layer and padding. While mostly hidden, two crucial parts of the nagajuban are visible when fully dressed: the lower edge of the sleeves and the han-eri (detachable collar). The han-eri is a canvas for subtle personal expression, often featuring delicate embroidery, seasonal motifs, or luxurious silk textures that peek out just a few millimeters from the outer kimono's collar. According to educational resources from the Smithsonian National Museum of Asian Art, the layering of collars and the precise exposure of the under-garment's neckline have historically been vital indicators of formality, refinement, and aesthetic taste in Japanese dress.
Seasonal Layering: Choosing the Right Nagajuban
Japan's distinct four seasons dictate not only the motifs on a kimono but also the weight, material, and construction of the undergarments. Wearing the correct seasonal nagajuban is a strict rule of kimono etiquette. Below is a comparison chart to help you select the appropriate under-kimono for the time of year.
| Nagajuban Type | Construction & Material | Appropriate Season | Average Cost (USD) |
|---|---|---|---|
| Awase | Lined; typically silk or polyester blends | October through May (Cool/Cold) | $80 - $300 |
| Hitoe | Unlined; lightweight silk, cotton, or synthetic | June and September (Mild) | $60 - $200 |
| Ro / Sha | Woven silk gauze with visible mesh-like gaps | July and August (Hot/Humid) | $120 - $400 |
During the sweltering Japanese summer, the Ro and Sha nagajuban are essential. Their open-weave structure allows air to circulate between the body and the outer summer kimono (which is also made of sheer fabrics like ro or sha), creating a natural cooling effect. In winter, the lined awase nagajuban provides necessary insulation, sometimes supplemented by an additional inner layer called a han-juban for extreme cold.
The Art of Tying: Koshihimo and Datejime
Unlike Western garments that rely on buttons, zippers, or tailored seams to stay in place, the kimono and its undergarments are secured entirely through tension and tying. This requires specific accessories:
- Koshihimo: These are long, narrow ties (usually about 130cm long) made of cotton, silk, or modern elastic velcro. A wearer typically uses three to four koshihimo to secure the nagajuban and the outer kimono. Cotton is preferred by traditionalists for its grip, while velcro versions are popular for their ease of use and adjustable tension.
- Datejime: Once the koshihimo have secured the garments, a datejime is tied over them. This is a wider, stiffer belt (traditionally woven silk, but often velcro or elastic in modern kits) that flattens the chest, smooths out the lines of the ties beneath it, and prevents the kimono collar from shifting or gaping open during movement.
Step-by-Step Layering Sequence
Dressing in a kimono is a ritualistic process. Here is the foundational sequence for layering your undergarments before the outer kimono is applied:
- Base and Pad: Put on the hadajuban and susoyoke (or hadagi). Apply the wafuku bra, hip pads, and waist towels to create a straight, cylindrical torso.
- Don the Nagajuban: Slip your arms into the nagajuban. Ensure the center back seam aligns perfectly with your spine.
- Align the Collar: Cross the left side of the nagajuban over the right side (the right-over-left style is strictly reserved for dressing the deceased). Adjust the collar so it sits snugly against the base of your neck, pulling the back of the collar down slightly to expose the nape of the neck—a highly elegant focal point in Japanese aesthetics.
- First Tie (Koshihimo): Tie the first cotton koshihimo tightly around your waist, just above the hip bones, to secure the length and collar placement.
- Smooth the Excess: Pull the excess fabric of the nagajuban up and over the koshihimo, smoothing it down to create a straight line. This creates the ohashori (the fold at the waist), which is crucial for adjusting the garment's length.
- Flatten with Datejime: Wrap the datejime over the koshihimo and the folded fabric to lock everything in place and smooth the silhouette.
Historical Context and Cultural Significance
The modern layering system is a streamlined descendant of much more elaborate historical practices. During the Heian period (794–1185), court nobles wore the junihitoe, a breathtakingly complex ensemble consisting of up to twelve or more layered robes, where the color combinations of the peeking collars and cuffs conveyed deep poetic and seasonal meanings. As the Victoria and Albert Museum's comprehensive Kimono exhibition notes, the transition from the layered court robes to the singular, streamlined kosode (the direct ancestor of the modern kimono) during the Muromachi and Edo periods shifted the decorative focus to the outer surface, while the undergarments took on the structural and protective roles we recognize today.
Despite this simplification, the concept of kasane (layering) remains deeply embedded in Japanese sartorial culture. The subtle glimpse of a beautifully embroidered han-eri or the flash of a vibrant silk nagajuban sleeve when the wearer moves is considered iki—an expression of understated, sophisticated elegance that values hidden beauty over ostentatious display.
Common Mistakes for Beginners
For those new to kimono dressing, the undergarments can be the most frustrating hurdle. Avoid these common pitfalls:
- Visible Collar Gaps: Failing to pull the back of the nagajuban collar down sufficiently results in a choked, uncomfortable look. The nape should be exposed by about two to three finger-widths.
- Wrong Seasonality: Wearing a lined awase nagajuban in August is not only uncomfortably hot but is considered a major fashion faux pas in traditional circles.
- Uneven Padding: Skipping the hip and waist padding may seem like a time-saver, but it inevitably leads to the outer kimono wrinkling, twisting, and the obi sagging as the day progresses.
Conclusion
Mastering kimono undergarments and layering basics is the gateway to truly understanding traditional Japanese dress. The hidden architecture of the hadajuban, padding, and nagajuban transforms the act of wearing a kimono from simply putting on clothes into an exercise in structural engineering and cultural appreciation. By investing in the proper foundational layers and respecting the seasonal rules of layering, you ensure that your kimono not only looks breathtakingly elegant but also feels secure, comfortable, and deeply connected to centuries of Japanese textile tradition.