Master the Otaiko Musubi: Step-by-Step Obi Tying Guide
The Art of the Otaiko Musubi: An Introduction
The Otaiko Musubi, often translated as the 'drum knot', is arguably the most iconic and versatile obi tying style in Japanese traditional dress. Originating in the Edo period and popularized by geisha in the Fukagawa district, this knot creates a smooth, rounded cushion at the lower back that exudes understated elegance. According to the Metropolitan Museum of Art, the evolution of the obi from a slender cord to a wide, heavily brocaded sash fundamentally shifted the silhouette of the kimono, making the knot itself a central piece of sartorial art.
For modern enthusiasts, mastering the Otaiko Musubi is a rite of passage. It is the standard knot for semi-formal to formal occasions, pairing beautifully with tsukesage, houmongi, and edokomon kimono. While it may look impossibly complex, the geometry of the knot relies on a few precise measurements and the strategic use of traditional dressing accessories. In this comprehensive guide, we will break down the process of tying a flawless Otaiko Musubi using a Nagoya obi, complete with timing estimates, tool requirements, and expert troubleshooting tips.
Essential Tools and Measurements
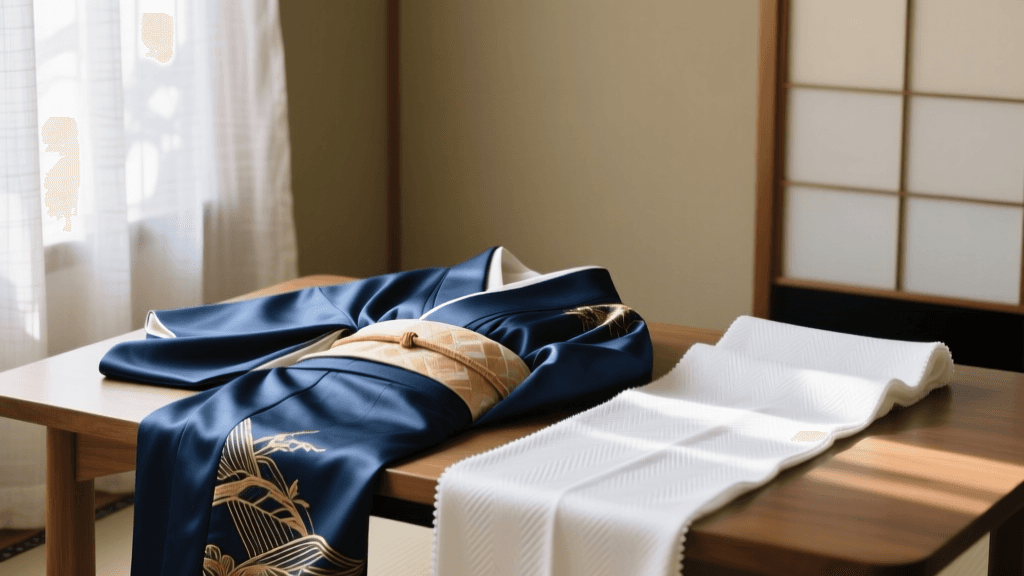
Before you begin tying, you must gather the proper kitsuke (dressing) tools. Attempting to tie a formal knot without these accessories will result in a sagging, unstable silhouette. Here is what you need:
- Fukuro or Nagoya Obi: A Nagoya obi (approx. 315 cm long) is pre-folded and easier for beginners, while a Fukuro obi (approx. 430 cm long) requires folding but offers more formal versatility.
- Obi-ita (Front Board): A stiff, felt-covered board placed between the obi layers at the front to prevent wrinkling. Cost: $10 - $25.
- Obi-makura (Obi Pillow): A padded cushion used to give the Otaiko 'drum' its signature rounded volume. Cost: $8 - $15.
- Obiage (Silk Scarf): A decorative cloth used to cover and secure the obi-makura. Cost: $30 - $100+ for silk.
- Obijime (Decorative Cord): A braided silk cord that cinches the center of the knot, providing structural integrity and a pop of contrasting color. Cost: $25 - $150.
- Kohimo (Binding Cords) or Clips: Temporary ties to hold fabric in place while your hands are busy. Cost: $5 - $12.
Time Estimate: A professional dresser can complete an Otaiko Musubi in under 5 minutes. For a beginner following this tutorial, allocate 25 to 40 minutes of uninterrupted practice time.
Obi Types and Knot Compatibility
Not all obi are created equal, and choosing the wrong type will make tying the Otaiko Musubi frustrating or impossible. Refer to the chart below to ensure your textile matches your desired knot and formality level.
| Obi Type | Width | Length | Best Knots | Formality | Average Cost (USD) |
|---|---|---|---|---|---|
| Hanhaba | 15 cm | 300 cm | Bunko, Rikko | Casual (Yukata) | $30 - $80 |
| Nagoya | 30 cm (tapered) | 315 cm | Otaiko, Bunko | Semi-Formal | $100 - $500 |
| Fukuro | 30 cm | 415-450 cm | Otaiko, Nijuudaiko | Formal | $300 - $2,000+ |
| Maru | 68 cm (folded) | 450+ cm | Nijuudaiko | Ultra-Formal (Bridal) | $1,000 - $10,000+ |
Step-by-Step Guide: Tying the Otaiko Musubi
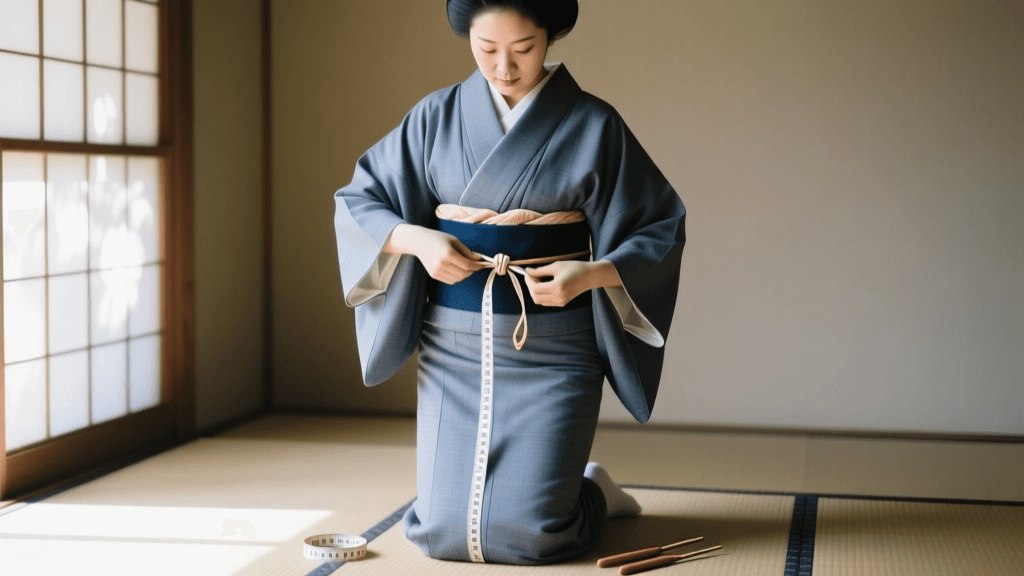
This tutorial assumes you are wearing a standard Nagoya obi. Ensure your kimono is already securely tied at the waist with your koshi-himo (waist ties) and the front obi-ita is in place.
Step 1: The Kari-Musubi (Temporary Knot)
Find the hiku-sun (the designated starting mark or center point) on your obi. Wrap the obi around your waist twice. The tesaki (short end) should be left hanging at about 50 cm in length, draped over your left shoulder. The tare-saki (long end) continues to wrap around your body. Where the two ends meet at your front right hip, cross the long end over the short end, pull it up through the wrapped layers, and tie a simple, tight temporary knot. Use a clip to secure the short tesaki end to your collar so it doesn't slip while you work.
Step 2: Forming the Otaiko (The Drum)
Take your obi-makura (pillow) and wrap it in your obiage (silk scarf), tying the ends of the scarf loosely at the front. Insert the pillow into the loop of the tare-saki (long end) behind your back. Pull the long end up and over the pillow to create a smooth, rounded canopy. This canopy is the 'drum'. The bottom edge of the drum should sit gracefully just above your hips, while the top edge aligns with your lower back. Pinch the excess fabric of the long end beneath the pillow and tie it tightly to the temporary knot using one of your kohimo (binding cords).
Step 3: Folding the Tare-saki (The Tail)
The remaining tail of the long end must be tucked inside the drum to create a clean finish. Fold the tail inward so that it sits flush against the inside of the obi layers. The All Japan Kimono Consultant Association emphasizes that the inner fold must be perfectly flat to prevent bulkiness that disrupts the kimono's silhouette. Secure this inner fold with another temporary cord.
Step 4: Securing the Obiage and Obijime
Now, address the obiage. Untie the front knot, pull the scarf taut around the top edge of the obi pillow to hide it completely, and tie a neat, flat half-bow at the center front, tucking the ends into the top of the obi. Next, take your obijime (cord). Wrap it around the exact center of the Otaiko drum, pulling it incredibly tight—this cord is the structural anchor of the entire knot. Tie a secure square knot at the front, tuck the tassels or ends neatly into the sides of the knot, and adjust the front layers for symmetry. Finally, remove all temporary clips and cords.
Troubleshooting Common Mistakes
'Patience is the thread that binds the kimono. Do not rush the obi; let the fabric guide your hands.' — Master Kitsuke Instructor, Kyoto
- The Otaiko is Sagging: This happens when the obijime is not pulled tight enough, or the obi-makura is too small for the volume of fabric. Ensure you are pulling the cord with your full body weight, not just your arm strength.
- The Front Obi is Wrinkling: You may have forgotten the obi-ita (front board), or you wrapped the obi too loosely around the waist before tying the temporary knot. Always pull the waist wraps taut.
- Asymmetrical Drum: When pulling the long end over the pillow, ensure you are pulling evenly from both the top and bottom edges of the fabric. Silk brocade can shift; use your thumbs to smooth the pattern horizontally.
Modern Styling and Cultural Context
While the traditional rules of kitsuke are strict, modern fashion has seen a rise in gender-inclusive kimono styling and contemporary color pairings. The Victoria and Albert Museum notes that the kimono is a living garment, constantly adapting to modern aesthetics while retaining its structural heritage. Today, it is increasingly common to see vintage, brightly colored obijime paired with muted, antique silk obi to create a striking, fashion-forward contrast.
Furthermore, sustainable production methods are reviving the obi market. Many modern dressers are opting for upcycled vintage Fukuro obi or sustainably woven hemp and cotton blends for summer wear, proving that the Otaiko Musubi is not just a relic of the past, but a dynamic, evolving art form.
Conclusion
Tying the Otaiko Musubi is a meditative practice that connects you to centuries of Japanese textile artistry. By understanding the precise measurements, investing in the correct dressing tools, and practicing the geometry of the knot, you can achieve a flawless, semi-formal silhouette. Whether you are attending a traditional tea ceremony, a summer festival, or a modern cultural gala, the drum knot will ensure you are dressed with grace, respect, and impeccable style.