Master the Otaiko and Bunko Obi Knots: Step-by-Step Guide
The Art of the Obi: More Than Just a Belt
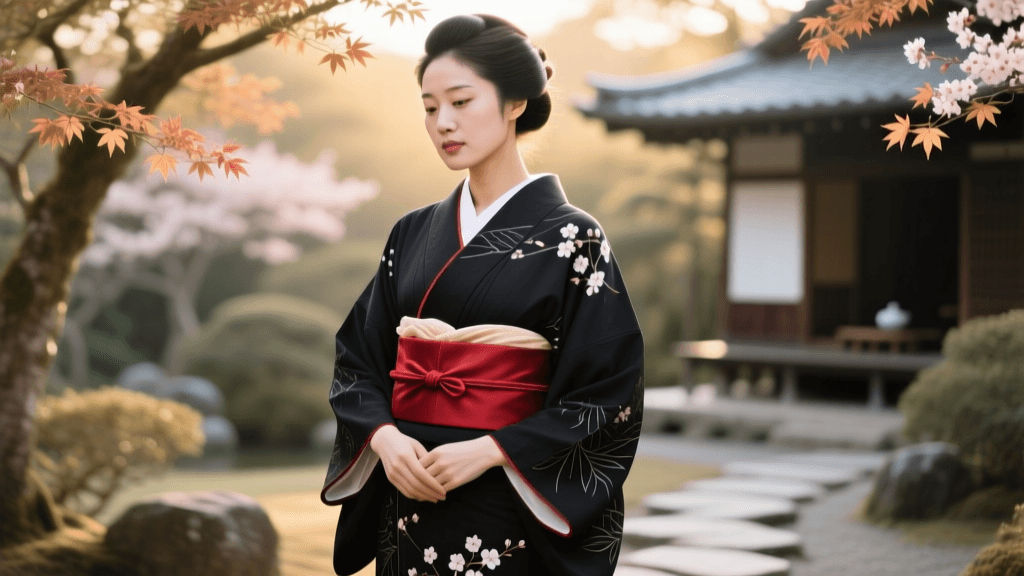
The obi is the defining centerpiece of Japanese traditional dress, serving not merely as a functional belt but as a profound canvas for artistic expression and cultural signaling. According to the Victoria and Albert Museum, the obi evolved dramatically from a narrow, utilitarian cord in the 16th century into the wide, heavily brocaded sash seen in modern formal wear. Tying an obi is a meticulous art form that requires patience, precision, and an understanding of spatial geometry.
Whether you are preparing for a formal tea ceremony, a summer festival, or a wedding, mastering the foundational knots is essential. In this comprehensive tutorial, we will break down the two most iconic and widely used obi knots: the formal Otaiko Musubi (Drum Bow) and the versatile Bunko Musubi (Butterfly Bow). Expect to spend about 15 to 20 minutes practicing these knots before achieving muscle memory.
Essential Tools and Measurements
Before you begin tying, you must gather the correct accessories. Attempting to tie an obi without these structural supports will result in a sagging, uncomfortable fit. According to experts at Kimono Navigator, proper under-structures are the secret to all-day comfort.
- Koshi-himo (Waist Ties): You will need 3 to 4 cotton or silk ties, typically 90 cm long and 5 cm wide, used to secure the kimono and obi in place.
- Obi-ita (Stiffening Board): A rigid board (approx. 45 cm x 15 cm) placed between the obi layers to prevent wrinkling and ensure a smooth front panel.
- Obi-makura (Cushion Pad): A small, firm pillow used to give the Otaiko knot its signature elevated, drum-like volume.
- Obi-age (Silk Scarf): A decorative silk cloth used to cover the obi-makura and add a pop of contrasting color.
- Obi-jime (Braided Cord): A sturdy, decorative cord (approx. 150 cm long) used to cinch the center of the knot and lock the entire structure together.
Choosing Your Knot: Comparison Chart
Selecting the right knot depends on your garment's formality, the type of obi you own, and the occasion. Refer to the table below to ensure your styling aligns with traditional etiquette.
| Knot Name | Formality Level | Best Obi Type | Difficulty | Primary Occasion |
|---|---|---|---|---|
| Otaiko Musubi | High (Formal/Semi-Formal) | Fukuro Obi (30cm x 4.5m) | Advanced | Weddings, Tea Ceremonies, Graduations |
| Bunko Musubi | Low to Medium (Casual) | Hanhaba Obi (15cm x 3.5m) | Beginner | Summer Festivals, Yukata, Casual Outings |
| Kawari Musubi | Variable (Fashion-forward) | Hanhaba or Nagoya Obi | Intermediate | Coming of Age Day, Anime/Cosplay Events |
Tutorial 1: The Otaiko Musubi (Formal Drum Bow)
The Otaiko Musubi is the gold standard for married women and older unmarried women wearing formal kimono (such as Kurotomesode or Houmongi). It creates a smooth, box-like fold at the back that resembles a traditional Japanese drum. For this tutorial, we assume you are using a Nagoya obi (which is pre-folded and easier for beginners) or a standard Fukuro obi.
Step 1: Establish the Tare (Hanging End)
Drape the obi around your waist with the patterned side facing out. Determine the length of the tare (the hanging end). For a standard Otaiko, leave exactly 40 to 45 centimeters of the tare hanging down past your hip bone. Pinch this point tightly.
Step 2: Wrap and Secure
Wrap the longer end (the te) around your waist twice, pulling it taut to ensure the kimono beneath is secure. Overlap the te over the tare at your front center. Use your first koshi-himo to tie the obi securely at the front, just above the hip bones. Tuck the ends of the tie away.
Step 3: Insert the Obi-ita and Pad
Slide the obi-ita board between the obi and the kimono at the front to smooth out any wrinkles. At the back, slide the obi-makura (cushion pad) under the top layer of the obi, positioning it right at the center of your back to create the structural base for the "drum."
Step 4: Form the Otaiko Fold
Take the hanging tare end and pull it upward, folding it horizontally over the obi-makura. The width of this fold should match the width of your obi-makura (usually about 20 cm). The bottom edge of the folded tare should rest just below the small of your back. This creates the flat "drum" surface.
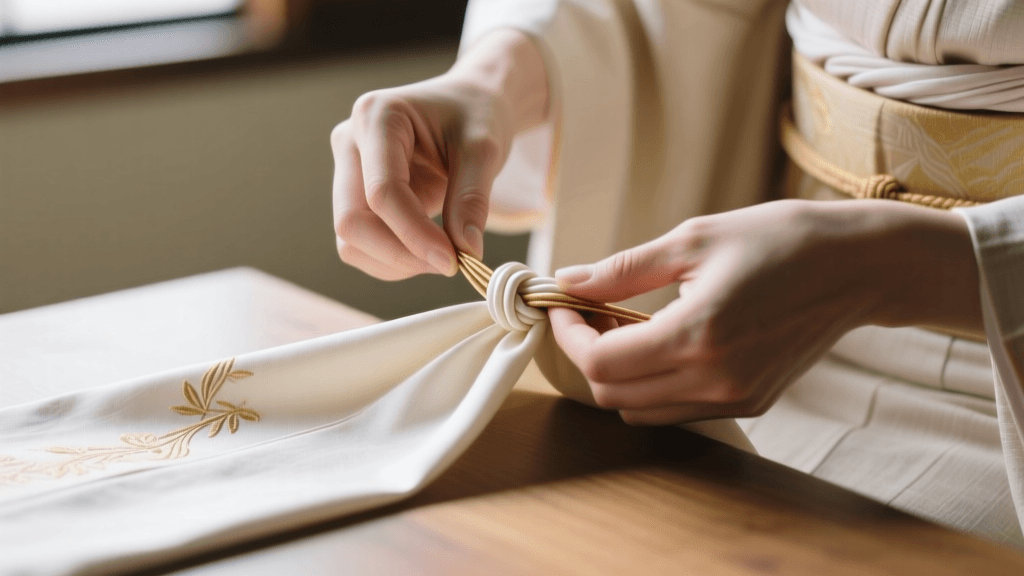
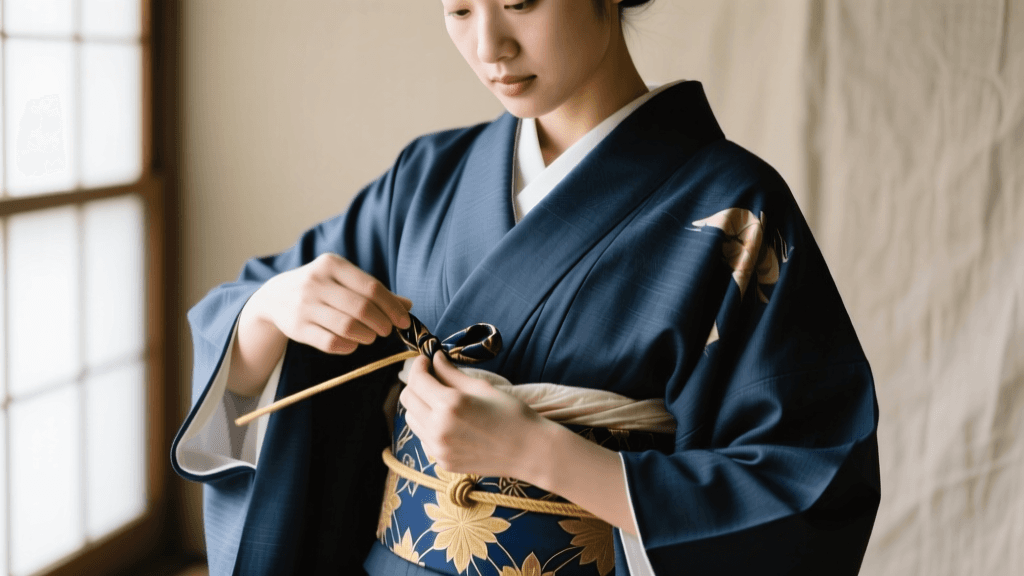
Step 5: Secure the Te and Tie the Obi-jime
Take the te (working end) that you wrapped around your waist, pull it tightly across the center of the Otaiko fold you just created, and tuck it securely underneath the bottom wrapped layer of the obi at the front. Next, wrap the obi-jime cord around the exact center of the Otaiko fold at the back, bring it to the front, and tie it in a secure, flat square knot. Tuck the obijime ends neatly under the knot.
Step 6: Dress the Obi-age
Wrap the obi-age silk scarf around the top of the obi, covering the obi-makura strings entirely. Tie it in a loose knot at the front and tuck the excess fabric neatly into the top fold of the obi, leaving only a sliver of the colorful silk visible.
Tutorial 2: The Bunko Musubi (Butterfly Bow)
The Bunko Musubi translates to "library knot" but is widely recognized as a butterfly or ribbon bow. It is the most popular knot for yukata (summer cotton kimono) and utilizes the narrower, more pliable Hanhaba obi. It is youthful, playful, and significantly faster to tie.
Step 1: Measure the Tare
Place the center of the Hanhaba obi against your back or side. Leave a longer tare than you would for the Otaiko—approximately 50 to 60 centimeters. The patterned side should face outward.
Step 2: Wrap the Waist
Wrap the longer end around your waist twice, pulling firmly. Hanhaba obi is much softer and lacks the rigid core of formal obi, so you must pull it tight to prevent it from slipping down throughout the day. Cross the ends at the front.
Step 3: Create the Butterfly Loops
Take the longer working end and fold it into an accordion-style pleat, creating two or three loops of equal size (about 15 cm wide each). This forms the "wings" of the butterfly. Pinch the center of these loops tightly.
Step 4: Tie the Knot
Take the shorter tare end and wrap it tightly around the pinched center of your pleated loops twice. Pull the tare end completely through the center to form a tight, secure knot.
Step 5: Fluff and Adjust
Rotate the entire knot to the back of your waist. Carefully pull and fluff the loops to make them symmetrical and voluminous. Adjust the hanging ends so they fall gracefully downward or slightly outward, mimicking the tails of a butterfly.
Expert Tips for All-Day Comfort and Posture
Wearing a tightly bound obi can restrict breathing and cause fatigue if not managed correctly. The Metropolitan Museum of Art notes that historical garments heavily dictated the physical posture of the wearer, a reality that persists in modern kitsuke (the art of dressing). To maintain elegance and comfort:
- Breathe from the Chest: Because the obi compresses the diaphragm and upper abdomen, you must train yourself to take shallow, controlled breaths from the upper chest and shoulders.
- Maintain a Straight Spine: Slouching will cause the Otaiko fold to gap away from your back, ruining the silhouette and causing the heavy brocade to drag downward. Keep your shoulders rolled back and your chin parallel to the floor.
- The Sitting Technique: When sitting on a tatami mat or a chair, never lean your full body weight back against the Otaiko knot. Sit upright or slightly forward, using your core muscles to support the garment's structure.
- Emergency Pins: For modern wearers attending long events, it is highly recommended to use two large, decorative safety pins (hidden beneath the obi-jime) to anchor the Otaiko fold to the underlying obi layers, preventing gravity from pulling the drum shape apart over several hours.
Conclusion
Mastering the obi is a journey that bridges the gap between simply wearing a garment and truly embodying Japanese traditional aesthetics. Whether you are crafting the refined, architectural lines of the Otaiko Musubi for a formal gathering, or the cheerful, fluttering wings of the Bunko Musubi for a summer fireworks festival, the key lies in precise measurements, the right structural tools, and confident posture. With consistent practice, the geometry of the obi will become second nature, allowing you to step out in flawless, culturally resonant style.