How to Tie an Obi: Step-by-Step Tutorials for Beginners
The Art of the Obi: More Than Just a Sash
The obi is the structural and aesthetic soul of traditional Japanese clothing. Far from being a simple belt, it is an architectural masterpiece that dictates the silhouette, formality, and seasonal appropriateness of a kimono ensemble. According to the Victoria and Albert Museum, the obi evolved dramatically from a narrow, functional cord in the early Edo period into a wide, heavily brocaded centerpiece that often cost more than the kimono itself. Today, tying an obi is a respected discipline, requiring precision, specific tools, and an understanding of traditional geometry.
Whether you are preparing for a tea ceremony, attending a summer festival, or exploring the historic streets of Kyoto, mastering the fundamental obi knots is essential. The Japan National Tourism Organization frequently highlights kimono dressing as a premier cultural immersion activity for visitors, making these skills highly practical for modern travelers and enthusiasts alike.
Understanding Obi Types and Measurements
Before attempting any knot, you must select the correct obi for your garment and the occasion. Using a casual obi for a formal knot will result in structural failure and a cultural faux pas. Below is a comprehensive guide to the most common obi types, their standard measurements, and their appropriate use cases.
| Obi Type | Width | Length | Formality | Best Knots |
|---|---|---|---|---|
| Maru Obi | ~68 cm (folded to 34 cm) | ~420 cm | Ultra-Formal (Bridal) | Otaiko, Fukura-suzume |
| Fukuro Obi | ~31 cm | ~420 cm | Formal / Semi-Formal | Otaiko, Niju-daiko |
| Nagoya Obi | ~31 cm (partially pre-folded) | ~315 cm | Semi-Formal / Smart Casual | Ichiju-daiko (Otaiko) |
| Hanhaba Obi | ~15 cm | ~360 cm | Casual (Yukata / Wool) | Bunko, Asagao |
| Kaku Obi | ~10 cm | ~390 cm | Men's Formal / Casual | Kai-no-kuchi, Bunko |
The Essential Obi Toolkit
Tying an obi securely for all-day wear requires more than just the fabric. A proper dressing kit (kitsuke dogu) ensures the knot maintains its shape and the wearer remains comfortable. Expect to invest between $40 and $150 for a complete, high-quality beginner toolkit.
- Koshi-himo (Waist Cords): Long, thin cotton or silk cords used to secure the kimono and hold the heavy obi in place while you tie it. You will need at least three.
- Date-jime (Under-sash): A wider, elastic or silk sash tied over the koshi-himo to flatten the fabric bulk around the waist.
- Obi-ita (Obi Board): A stiff, felt-covered board inserted into the front of the obi to prevent wrinkling and maintain a smooth, flat surface.
- Obi-makura (Obi Pillow): A small, padded cushion used to give volume and structure to the top of formal knots like the Otaiko.
- Obi-age (Obi Sash): A silk scarf-like cloth that wraps around the obi-makura, hiding the pillow while adding a pop of contrasting color at the top edge of the obi.
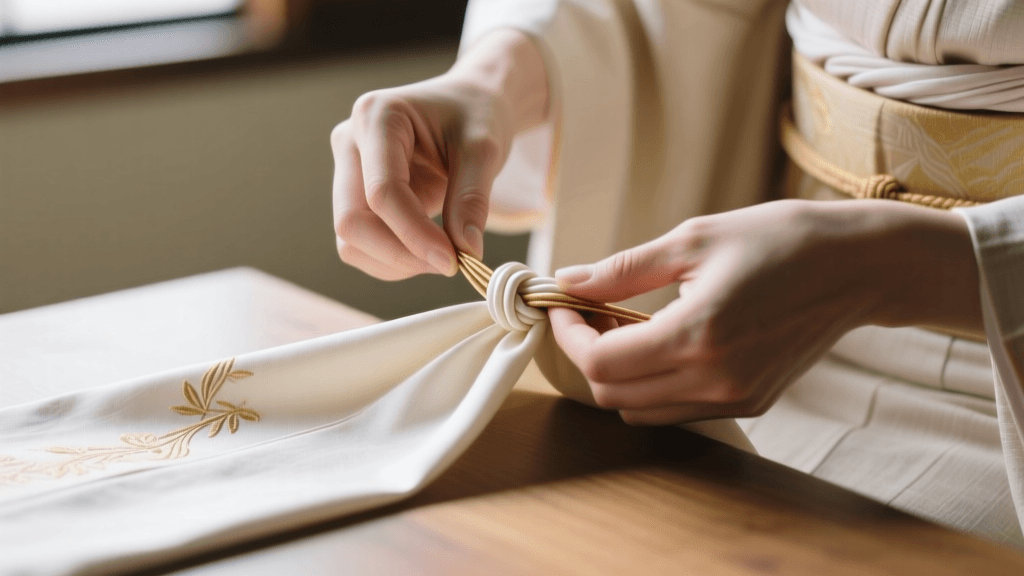
- Obi-jime (Obi Cord): A decorative, braided cord tied securely around the center of the obi to lock the knot in place.
Tutorial 1: The Otaiko Musubi (Formal Women's Knot)
The Otaiko (meaning 'drum') is the most ubiquitous formal knot for women, characterized by a smooth, box-like fold at the back that resembles a taiko drum. It is elegant, understated, and appropriate for weddings, tea ceremonies, and graduation ceremonies. This tutorial uses a Nagoya Obi.
Step-by-Step Instructions
Timing: 10-15 minutes for beginners.
Prep: Ensure your kimono is securely tied with koshi-himo and date-jime. Place the obi-ita inside the front panel.
- Positioning: Find the 'tesaki' (the narrow, pre-folded end of the Nagoya obi). Leave about 50 cm of the tesaki hanging over your left shoulder, with the folded edge facing up. Wrap the wider 'tare' (tail) end around your waist from left to right, overlapping it over the tesaki at the front.
- The First Wrap: Continue wrapping the tare around your waist a second time. Keep the tension tight and the bottom edge aligned perfectly with the first wrap.
- Crossing the Back: Bring the tare to the front and cross it over the hanging tesaki. Pull the tare tightly to secure the wraps. Use a temporary koshi-himo to tie the obi securely to your waist while you work on the back.
- Creating the Drum: Move to the back. Take the tare end and fold it upward to create the 'drum' shape. The width of the drum should match the width of your back. Insert the obi-makura inside this fold to give it volume, and tie the makura's strings securely at the front.
- Securing the Tare: Tuck the remaining tare fabric up and under the obi wraps at the back, hiding the raw edge inside the drum fold. Use an obi-clip or your hand to hold it in place.
- The Obi-age and Obi-jime: Wrap the obi-age around the obi-makura, tucking the ends neatly into the top of the obi at the front. Finally, wrap the obi-jime around the exact center of the obi, pulling it taut, and tie it in a secure, flat square knot at the front. Remove the temporary koshi-himo and adjust the front tesaki so it lays flat.
Tutorial 2: The Bunko Musubi (Casual Women's Bow)
The Bunko (meaning 'library' or 'book box') is a classic, youthful bow knot. It is the standard knot for summer yukata and casual wool kimonos, tied using a Hanhaba Obi. The Metropolitan Museum of Art notes that during the Edo period, the proliferation of bow knots among young women served as a vibrant form of silent, sartorial expression, a tradition that continues at modern summer festivals.
Step-by-Step Instructions
Timing: 5-8 minutes.
Prep: No obi-makura or obi-age is required for this casual style.
- Measure the Tesaki: Hold one end of the hanhaba obi (the tesaki) and measure out about 40 cm. Drape this section over your left shoulder, letting it hang down your back. The patterned side should face outward.
- Wrap the Waist: Take the long end (tare) and wrap it around your waist from front to back, keeping it snug. Wrap it around a second time, ensuring the bottom edges align perfectly.
- The Front Cross: Bring the tare to the front and cross it tightly over the hanging tesaki. Tie a temporary half-knot to hold the tension, or use a koshi-himo.
- Forming the Bow Loops: Move to the back. Take the long tare and fold it into accordion pleats or simple loops to create the 'wings' of the bow. The total width of the pleated section should be roughly the width of your shoulders.
- Tying the Center: Take the short tesaki that was hanging over your shoulder and wrap it tightly around the center of the pleated bow loops. Tie it securely in a tight square knot at the very center of the back.
- Final Adjustments: Fluff out the bow loops to make them symmetrical. Tuck any excess tesaki fabric into the top of the obi wraps. Ensure the bow sits centered on your spine.
Tutorial 3: The Kai-no-Kuchi (Traditional Men's Knot)
The Kai-no-kuchi (meaning 'shell mouth') is the most common and versatile knot for men, suitable for both formal and casual wear. It is flat, secure, and designed to be comfortable when sitting in seiza (kneeling) or leaning back against a chair. It utilizes a stiff silk or cotton Kaku Obi.
Step-by-Step Instructions
Timing: 5 minutes.
- Initial Drape: Hold the obi against your right hip, leaving a tesaki (short end) of about 30 cm hanging down. Wrap the long end around your waist from right to left, pulling it very tightly. Men's obi are worn lower on the hips, resting on the pelvic bone, not the natural waist.
- Second Wrap: Continue wrapping the long end around a second time, keeping the tension high and the edges aligned. Bring the long end to the front.
- The Front Tuck: Take the long end and pass it under the wrapped layers from the bottom up, pulling it through tightly to lock the wraps in place.
- Creating the Shell Shape: Take the short tesaki end and fold it in half horizontally. Take the long end and fold it horizontally as well, creating a flat, layered overlap that resembles an open clamshell.
- Locking the Knot: Pass the folded long end through the loop created by the folded short end. Pull it tight and flat against the body. Tuck any remaining excess fabric into the top edge of the obi wraps. The final knot should be flat, horizontal, and sit slightly off-center to the right.
Expert Tips for All-Day Comfort and Longevity
Tying the knot is only half the battle; maintaining it requires mindfulness and proper technique.
- Mind Your Posture: When tying the obi, stand with your feet shoulder-width apart and keep your back straight. Slouching while tying will cause the obi to sag when you eventually stand up straight.
- The 'Two-Finger' Rule: You should be able to slide exactly two fingers between the obi and your ribcage. Any tighter will restrict breathing and digestion; any looser will cause the heavy brocade to slide down throughout the day.
- Friction is Your Friend: If you are using a slippery silk Fukuro obi, place a small piece of double-sided kimono tape (or a textured silicone grip pad) between the obi layers at the back to prevent the heavy tare from sliding out of the Otaiko drum.
- Storage and Care: Never store a tied obi. After wearing, untie it immediately, fold it along its original creases, and store it in a breathable, acid-free paper envelope (tatoushi) with a natural camphor or cedar wood block to deter silverfish and absorb humidity.
Conclusion
Learning to tie an obi is a tactile journey into Japanese heritage. While the Otaiko demands patience and precision, the Bunko offers playful creativity, and the Kai-no-kuchi provides utilitarian elegance. By understanding the specific measurements, investing in the proper toolkit, and practicing these step-by-step tutorials, you transform a simple piece of woven silk into a profound statement of cultural appreciation and personal discipline.