How to Tie an Obi: Step-by-Step Bunko & Otaiko Tutorials
The Art of the Obi: More Than Just a Belt
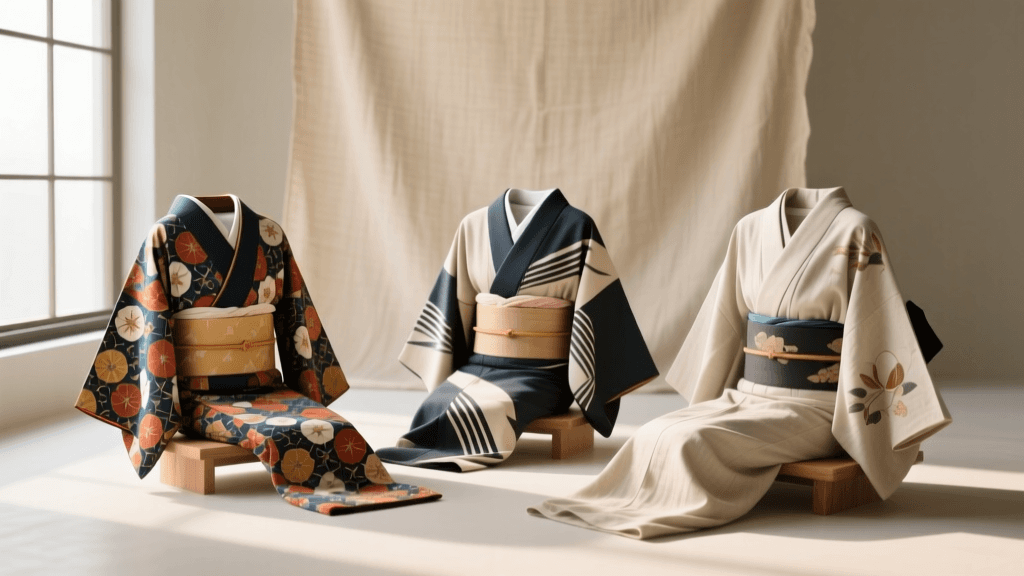
The obi is not merely a belt; it is the structural and aesthetic anchor of traditional Japanese clothing. While the kimono provides the canvas, the obi acts as the focal point, conveying the wearer's age, marital status, formality of the occasion, and personal taste. According to the Victoria and Albert Museum, the evolution of the obi from a simple, narrow cord in the Edo period to the wide, elaborate sashes seen today reflects centuries of shifting fashion, textile innovation, and cultural significance. Tying an obi is an art form that requires patience, precision, and an understanding of traditional aesthetics.
Before diving into the step-by-step tutorials, every kimono wearer must internalize the absolute golden rule of Japanese dressing: always wrap the left side of the garment over the right side. Wrapping right-over-left is strictly reserved for dressing the deceased for funerals. This rule applies to both the kimono and the underlying nagajuban (undergarment). The Japan National Tourism Organization frequently highlights this cultural nuance in their guides for travelers participating in kimono rental experiences, as making this mistake is considered highly inauspicious.
Essential Tools and Measurements for Obi Dressing
You cannot tie a proper obi with the sash alone. A network of hidden ties, pads, and cords is required to maintain the silhouette and secure the knot. Below is a comprehensive breakdown of the tools you will need, including standard measurements and estimated costs for modern practitioners.
| Tool Name | Purpose | Standard Measurements | Estimated Cost (USD) |
|---|---|---|---|
| Koshi-himo (Waist Ties) | Long, thin cotton or silk ties used to secure the kimono and obi in place temporarily. | 90cm - 100cm long, 4cm wide (Need 3-4) | $10 - $25 each |
| Date-jime (Under-belt) | A wider belt worn over the koshi-himo to flatten bulk and prepare the torso for the obi. | 8cm - 10cm wide, 200cm long | $15 - $40 |
| Obi-makura (Obi Pillow) | A foam or cotton pad used to give volume and shape to formal knots like the Otaiko. | 15cm x 8cm x 5cm | $10 - $25 |
| Obi-age (Obi Scarf) | A silk or polyester cloth used to cover the obi-makura and add a pop of color at the top edge. | 30cm x 120cm | $20 - $80 |
| Obi-jime (Obi Cord) | A decorative braided cord tied over the center of the obi to secure the knot and add elegance. | 150cm - 180cm long | $30 - $150+ |
Tutorial 1: The Bunko Musubi (Bow Knot)
The Bunko Musubi, or 'library knot,' is the quintessential bow used for yukata (summer cotton kimono) and casual everyday kimono. It is youthful, playful, and relatively straightforward, making it the perfect starting point for beginners. The Smithsonian National Museum of Asian Art notes that cotton yukata and their accompanying simpler obi knots became widely popularized during the Edo period as leisurewear for festivals and hot springs.
Step 1: Establishing the Tesaki (Short End)
Hold the obi behind your back. Decide which end will be the tesaki (the short, decorative end). For a standard half-width (hanhaba) obi, measure out approximately 40cm to 50cm for the tesaki. Fold this section in half lengthwise to create a crisp edge, and drape it over your left shoulder, securing it temporarily with a clip or holding it with your left hand.
Step 2: Wrapping the Tare (Long End)
Take the longer end, known as the tare, and wrap it tightly around your waist twice, moving from left to right. The tension here is critical; it should be snug enough to support your posture but not so tight that it restricts breathing. Overlap the second wrap slightly higher than the first to create a subtle upward slant, which is visually flattering.
Step 3: Tying the Core
Bring the tare to the front, crossing it over the tesaki. Pull the tare up and through the loop you have just created at your waist, pulling it tightly to secure the obi to your body. Twist the knot so that the excess fabric of both the tesaki and tare now hang down your back.
Step 4: Forming the Bow
Take the hanging tare and create accordion-style pleats. For a classic look, make three to four even pleats. Pinch the center of these pleats tightly. Next, take the hanging tesaki, fold it in half to create the 'wings' of the bow, and wrap it around the pinched center of the tare pleats. Tuck the end of the tesaki through the loop created by the wrap to secure the bow.
Step 5: Final Adjustments
Slide the completed bow to the center of your back. Fluff out the wings of the bow and adjust the pleats so they cascade neatly downward. Tuck any excess fabric from the tare underneath the knot to hide it.
Tutorial 2: The Otaiko Musubi (Drum Knot)
The Otaiko Musubi is the standard, elegant knot worn with formal kimono such as the homongi, tsukesage, and iromuji. It utilizes a wider, stiffer obi (usually a Nagoya or Fukuro obi) and requires the obi-makura, obi-age, and obi-jime. The name 'drum' comes from the smooth, rounded, cylindrical shape the knot forms at the back, resembling a traditional Japanese taiko drum.
Step 1: Preparing the Obi and Tesaki
For a Nagoya obi, the tesaki is the narrower, pre-folded end. Measure out roughly one arm's length (about 70cm) for the tesaki and drape it over your left shoulder. Wrap the wider tare end around your body twice, ensuring the bottom edge aligns perfectly with your hip bones. The tension must be firm and even.
Step 2: Securing the Core with Koshi-himo
Unlike the Bunko, you will use a koshi-himo (waist tie) to secure the obi at the front before forming the knot. Tie the koshi-himo tightly over the overlapping obi layers at the front of your waist, tucking the ends of the tie in securely. Bring the tare and tesaki to the back.
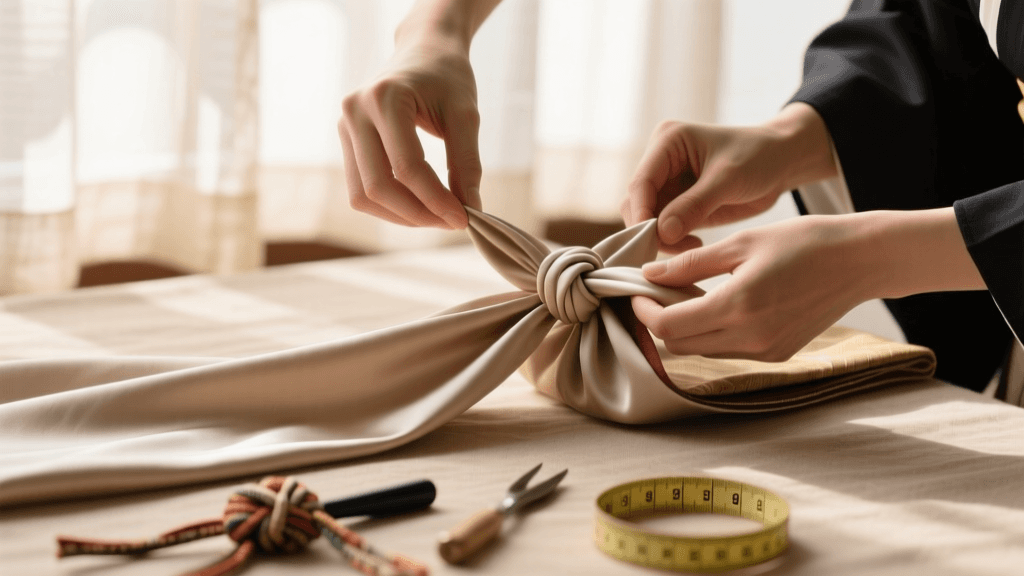
Step 3: Inserting the Obi-makura
Take your obi-makura (pillow) and wrap the obi-age (scarf) around it, tying the ends of the scarf loosely at the front. Insert the obi-makura into the top fold of the tare at your back, pushing it upward to create the structural volume required for the drum shape. Tie the obi-age securely at the front of your chest to hold the pillow in place.
Step 4: Creating the Drum Shape
Pull the tare end down over the obi-makura, smoothing the fabric to create a taut, flat surface over the pillow. Fold the excess width of the tare underneath itself so that the visible portion is about 15cm wide. Take the tesaki and wrap it tightly around the center of this 'drum' to cinch it. Tuck the end of the tesaki into the top fold of the obi at your back to hide it.
Step 5: Applying the Obi-jime
Wrap the obi-jime (cord) around the exact center of the drum knot. Bring it to the front, tie a secure, flat square knot (hon-musubi), and tuck the fringed ends neatly into the sides of the knot. Adjust the obi-age at the front so that just a sliver of color peeks out above the top edge of the obi, typically no more than 1-2 centimeters, depending on your age and formality.
Comparison Chart: Bunko vs. Otaiko
Choosing the right knot depends entirely on the garment, the occasion, and the wearer's profile. Use the chart below to determine which knot is appropriate for your needs.
| Feature | Bunko Musubi (Bow Knot) | Otaiko Musubi (Drum Knot) |
|---|---|---|
| Formality | Casual to Semi-Formal | Formal to Ceremonial |
| Obi Type | Hanhaba (Half-width), Yukata Obi | Nagoya, Fukuro, Maru Obi |
| Age/Marital Status | Unmarried women, children, casual wear for all | Married women, older unmarried women, formal wear |
| Difficulty Level | Beginner (15-20 minutes) | Advanced (30-45 minutes) |
| Required Accessories | Koshi-himo only | Obi-makura, Obi-age, Obi-jime, Koshi-himo |
Pro-Tips for Troubleshooting and Maintenance
Even experienced dressers encounter challenges when tying an obi. The most common issue is the obi slipping down throughout the day. To prevent this, ensure your date-jime is tied tightly and sits flat against the ribs, providing a textured, non-slip base for the main obi. Additionally, using a small piece of double-sided fabric tape (specifically designed for textiles) at the front overlap of the obi can provide extra security without damaging delicate silk threads.
'The beauty of the kimono silhouette lies in its cylindrical shape. The obi should not cinch the waist like a Western corset; rather, it should bind the torso to create a smooth, columnar line that allows the patterns of the garment to flow uninterrupted.'
When it comes to maintenance, never store a tied obi. Always untie it immediately after wearing. For silk Fukuro and Nagoya obi, avoid washing them at home. Instead, air them out in a shaded, well-ventilated area for 24 hours before folding them along their original crease lines and storing them in acid-free tissue paper within a wooden drawer (tansu) to protect against moisture and pests. Cotton yukata obi can be gently hand-washed with a neutral detergent, rolled in a towel to absorb excess water, and ironed on a low setting while slightly damp.
Conclusion
Mastering the Bunko and Otaiko knots opens the door to the full spectrum of Japanese traditional fashion. While the physical act of tying the obi requires practice and muscle memory, the deeper reward lies in participating in a living cultural heritage. Whether you are preparing for a summer fireworks festival in a light cotton yukata or attending a formal tea ceremony in exquisite silk, understanding the architecture of the obi ensures you wear your kimono with both authenticity and grace.