How to Tie an Obi: Step-by-Step Otaiko Musubi Guide
The Art of the Obi: An Introduction
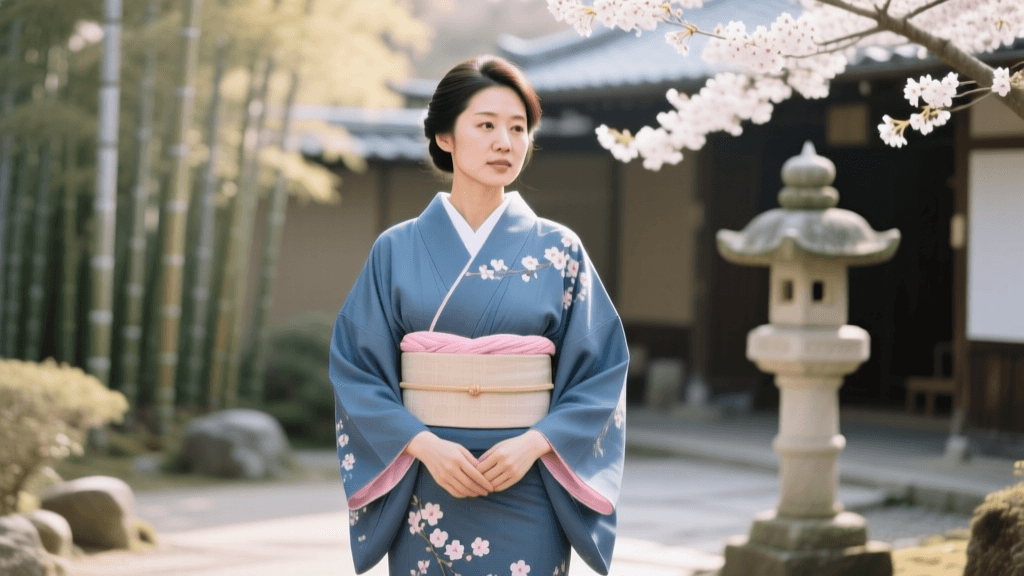
The obi is far more than a simple sash; it is the structural and aesthetic anchor of traditional Japanese dress. While the kimono provides a canvas of seasonal motifs and exquisite textiles, the obi dictates the formality, age-appropriateness, and overall silhouette of the ensemble. For beginners and cultural enthusiasts alike, learning how to tie an obi can seem like an insurmountable challenge. However, with the right tools, precise measurements, and a systematic approach, mastering the most iconic knot—the Otaiko Musubi (drum knot)—is entirely achievable.
According to the Victoria and Albert Museum, the evolution of the obi transformed it from a narrow, functional cord in the early Edo period into the wide, elaborately patterned centerpiece we recognize today. As the obi widened, the knots grew more complex, eventually requiring specialized undergarments and padding to maintain their sculptural shapes. This guide will walk you through the precise mechanics of tying the Otaiko Musubi, the standard knot for adult women, while providing actionable data on tools, costs, and timing.
Understanding Obi Types: Nagoya vs. Fukuro
Before attempting your first knot, it is crucial to select the correct type of obi. For beginners practicing the Otaiko Musubi, the Nagoya obi is highly recommended.
- Nagoya Obi: Measuring approximately 3.2 meters (10.5 feet) in length, the Nagoya obi is pre-folded and stitched along one edge, making it narrower and significantly easier to handle. It is the standard choice for semi-formal and casual occasions.
- Fukuro Obi: Measuring around 4.5 meters (14.7 feet) and fully wide (about 30 cm or 12 inches), the Fukuro obi is reserved for formal events. Its heavy brocade fabrics and excessive length require advanced dressing techniques and are not recommended for first-time learners.
Essential Tools and Measurements
Tying a traditional obi requires a specific kit of accessories, collectively known as obi-gu. Without these structural supports, the heavy silk will collapse. Below is a comprehensive breakdown of the tools you will need, complete with standard dimensions and average market costs.
| Tool Name | Japanese Term | Dimensions / Specs | Average Cost (USD) |
|---|---|---|---|
| Obi Sash | Nagoya Obi | 320 cm x 30 cm (126 x 12 in) | $80 - $300+ |
| Waist Ties (x2) | Koshi-himo | 100 cm x 5 cm (40 x 2 in), Cotton | $10 - $15 (pair) |
| Obi Board | Obi-ita | 50 cm x 15 cm (20 x 6 in), Felt/Plastic | $12 - $20 |
| Obi Pillow | Obi-makura | Cylindrical pad, elastic ties | $10 - $18 |
| Decorative Cord | Obi-jime | 150 cm (60 in), Braided silk | $25 - $60 |
| Top Scarf | Obi-age | 120 cm x 30 cm (47 x 12 in), Silk crepe | $20 - $50 |
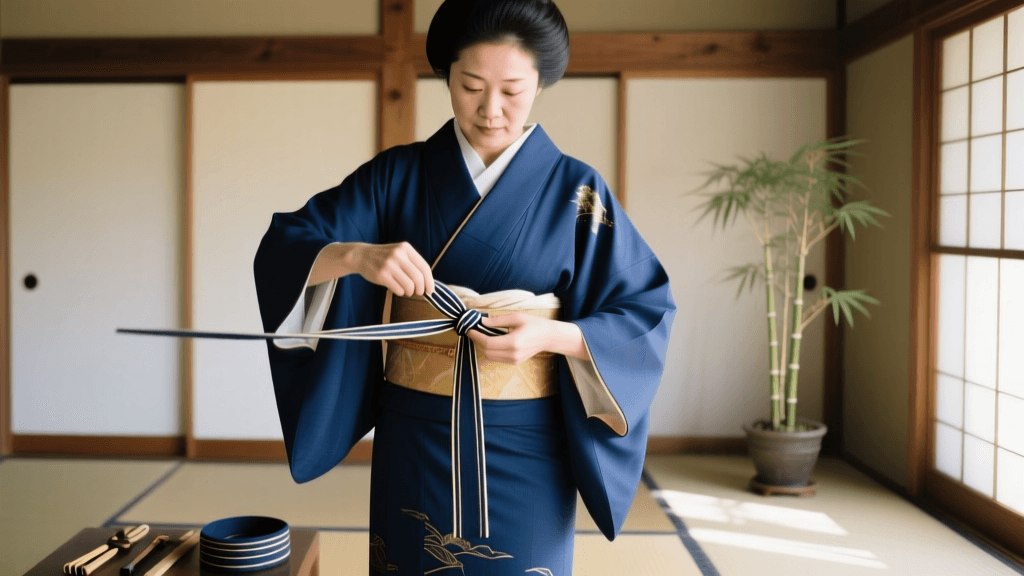
Step-by-Step Tutorial: Tying the Otaiko Musubi
The Otaiko Musubi is characterized by its smooth, rounded top and flat back, resembling a traditional Japanese drum. Allocate about 20 to 30 minutes for your first few attempts. Ensure you are already wearing your kimono and have secured the base silhouette with your initial koshi-himo ties.
Step 1: Preparation and the Obi-ita
Begin by wrapping the obi around your waist from the front to the back, ensuring the patterned side faces outward. Before completing the first full wrap, slide the obi-ita (obi board) between the obi and the kimono at the front of your waist. This crucial step prevents the heavy silk from wrinkling when pulled taut. Wrap the obi around your body a second time, aligning the top and bottom edges perfectly.
Step 2: Measuring the 'Te' and 'Tare'
The two ends of the obi are called the te (the short, upper end) and the tare (the long, lower end). Pull the intersection of the two ends to the center of your back. Measure exactly 40 centimeters (about 16 inches) of the te end, letting it hang upward. The remaining long end is the tare. Hold both ends firmly together at the center back and tie them tightly with a cotton koshi-himo (waist tie) to secure the base.
Step 3: Forming the Taiko (Drum) Shape
Take the obi-makura (pillow) and slide it underneath the tare end, resting it directly on top of the koshi-himo knot. Pull the tare upward and over the pillow, folding it down to create the smooth, rounded arch of the drum. The bottom edge of the tare should fall to about the top of your hips. Tuck the obi-makura's elastic ties securely under the main obi wrap at your sides.
Step 4: Securing the Obi-age
The obi-age is a silk scarf used to conceal the obi-makura. Drape the obi-age over the pillow, wrapping it around your waist to the front. Tie it in a loose, temporary half-knot at the front to hold the pillow in place while you work on the back. Ensure the fabric is smooth and the pillow remains perfectly horizontal.
Step 5: Finishing with the Obi-jime
The obi-jime is the decorative cord that cinches the center of the drum. Thread it through the folded layer of the tare at the exact center of the back. Bring it to the front and tie a secure, flat knot (usually a simple square knot or a specialized braided knot). Tuck the excess cord ends neatly behind the main obi wrap. Finally, return to the front, adjust the obi-age into a neat, tucked fold, and ensure the front obi board is perfectly straight.
Obi Knot Comparison Guide
While the Otaiko Musubi is the standard for adult women, Japanese fashion features dozens of knots tailored to specific ages, garment types, and formality levels. The Kyoto City Tourism Association notes that selecting the correct knot is just as important as choosing the right kimono pattern for cultural events.
| Knot Name | Visual Profile | Target Demographic | Formality Level |
|---|---|---|---|
| Otaiko Musubi | Smooth, flat drum shape | Adult / Married Women | Semi-Formal to Formal |
| Bunko Musubi | Large, elaborate bow | Young / Unmarried Women | Casual (Yukata) |
| Fukura-suzume | Puffy, sparrow-like bow | Young Women / Furisode | Highly Formal |
| Kai-no-kuchi | Flat, masculine fold | Men (All ages) | All Levels |
Practical Advice: Timing, Costs, and Tourist Experiences
For tourists visiting Japan, engaging with traditional dress is a highlight of the trip. Understanding the logistics of wearing and acquiring an obi can greatly enhance your experience.
Renting vs. Buying in Japan
If you are visiting Kyoto or Tokyo, kimono rental shops are abundant. A standard one-day rental, which includes a pre-tied obi or a staff member who will tie a traditional Otaiko or Bunko knot for you, typically costs between 4,000 JPY and 8,000 JPY ($25 to $55 USD). This is highly recommended for tourists, as dressing oneself properly takes years of practice. However, if you wish to purchase an authentic vintage Nagoya obi to take home and practice with, second-hand kimono markets (such as the famous Oedo Antique Market in Tokyo) offer beautiful silk pieces starting at around 3,000 JPY ($20 USD).
Maintenance and Storage
Silk obi are highly susceptible to humidity and direct sunlight. According to cultural preservation guidelines highlighted by the Japan National Tourism Organization (JNTO), traditional garments should never be dry-cleaned with harsh modern chemicals. Instead, spot clean with a damp cloth, air them out in the shade for a few hours after wearing, and store them flat in specialized tatou-shi (acid-free paper) to prevent the silk from yellowing or the metallic threads from tarnishing.
Final Thoughts for Beginners
Mastering the Otaiko Musubi is a rewarding journey into the heart of Japanese sartorial culture. Do not be discouraged if your first few attempts result in a lopsided drum or wrinkled silk. Utilize a full-length mirror, practice with a cheaper cotton or polyester Nagoya obi before risking expensive vintage silk, and remember that the elegance of the kimono lies as much in the patience of the wearer as in the beauty of the garment.