How to Tie an Obi: Step-by-Step Otaiko & Bunko Knot Guide
The obi is far more than a simple belt; it is the structural and aesthetic anchor of the Japanese kimono. Historically, as detailed by the Encyclopedia Britannica, the obi evolved from a narrow, functional cord in the Heian period to the wide, elaborately woven sashes seen today. By the Edo period, the obi had become a primary canvas for textile artistry, often costing more than the kimono itself. Understanding how to tie an obi is essential for anyone looking to wear traditional Japanese garments with authenticity and grace. According to the Metropolitan Museum of Art, the complex knots and luxurious fabrics of the obi signify the wearer's age, marital status, and the formality of the occasion. In this comprehensive guide, we will walk you through the precise measurements, essential accessories, and step-by-step tutorials for tying the two most iconic obi knots: the formal Otaiko Musubi (drum knot) and the versatile Bunko Musubi (bow knot).
Essential Obi Accessories and Measurements
Before attempting to tie an obi, you must gather the correct accessories. The modern kimono silhouette relies on a specific internal architecture to maintain its cylindrical, straight-lined shape while supporting the heavy knot at the back.
| Accessory | Japanese Name | Standard Dimensions | Purpose |
|---|---|---|---|
| Waist Ties | Koshihimo | 100 cm long, 5 cm wide | Secures the kimono and holds the obi in place during tying. |
| Under-Belt | Datejime | 80 cm long, 6-8 cm wide | Prevents the kimono collar from slipping and provides a base for the obi. |
| Obi Board | Obi-ita | Front: 45x15 cm, Back: 20x15 cm | Stiffeners inserted inside the obi to prevent wrinkling. |
| Obi Pillow | Obi-makura | 15 cm long, 8 cm thick | Creates the voluminous drum shape for formal knots like the Otaiko. |
| Obi Sash | Obi-age | 130 cm long, 25 cm wide | A silk crepe cloth that covers the obi-makura and adds a pop of color. |
| Decorative Cord | Obi-jime | 150 cm long, 1 cm thick | A braided cord tied over the center of the obi to secure the knot. |
Understanding Obi Types and Measurements
Choosing the right knot depends heavily on the type of obi you are wearing. The Victoria and Albert Museum notes that the structural differences in obi weaving dictate their drape and suitable knot styles.
- Hanhaba Obi (Half-Width): Measures 15 cm wide and 300-400 cm long. Used for casual wear and yukata. Best for the Bunko (bow) knot.
- Nagoya Obi: Measures 30 cm wide and 360 cm long. Pre-folded and stitched for ease of tying. The standard for semi-formal wear and the Otaiko knot.
- Fukuro Obi: Measures 31 cm wide and 420-450 cm long. Fully patterned and formal. Used for weddings and tea ceremonies.
Tutorial 1: Tying the Otaiko Musubi (Drum Knot)
The Otaiko Musubi is the most common knot for married women and older unmarried women wearing Nagoya or Fukuro obi. It creates a smooth, box-like drum shape at the back.
Step 1: Positioning and the First Wrap
Find the tesaki (the narrow or starting end of the obi). For a Nagoya obi, leave about 60 cm of the tesaki hanging over your left shoulder. Wrap the wider part of the obi around your waist from left to right, ensuring the bottom edge aligns with your hip bones. Keep the tension tight and even.
Step 2: The Second Wrap and Temporary Tie
Wrap the obi around a second time. Pull firmly to ensure there are no gaps between the obi and your body. Cross the long end (the tare) over the short end (tesaki) at the front center. Pull the tare up and under the wrapped obi, creating a tight, temporary knot at the front.
Step 3: Securing the Base
Take a koshihimo (waist tie) and wrap it tightly around the center of the obi knot at the front. Tie it securely at the back, tucking the excess ends in. This frees up your hands and ensures the obi will not slip while you form the drum.
Step 4: Forming the Drum with the Obi-Makura
Move to the back. Take the tare (the long hanging end) and fold it upward to determine the height of your drum—usually aligning with the shoulder blades. Place the obi-makura (pillow) inside the fold to create volume. Wrap the obi-age (sash) over the pillow, tying it loosely at the front to hold the pillow in place.
Step 5: Creating the Otaiko Fold
Take the bottom edge of the tare and fold it up and over the obi-makura, creating the flat drum top. The fold should sit just below the shoulder blades. Tuck the excess fabric of the tare down into the back of the obi wrap, hiding the raw edge.
Step 6: Securing with the Obi-Jime
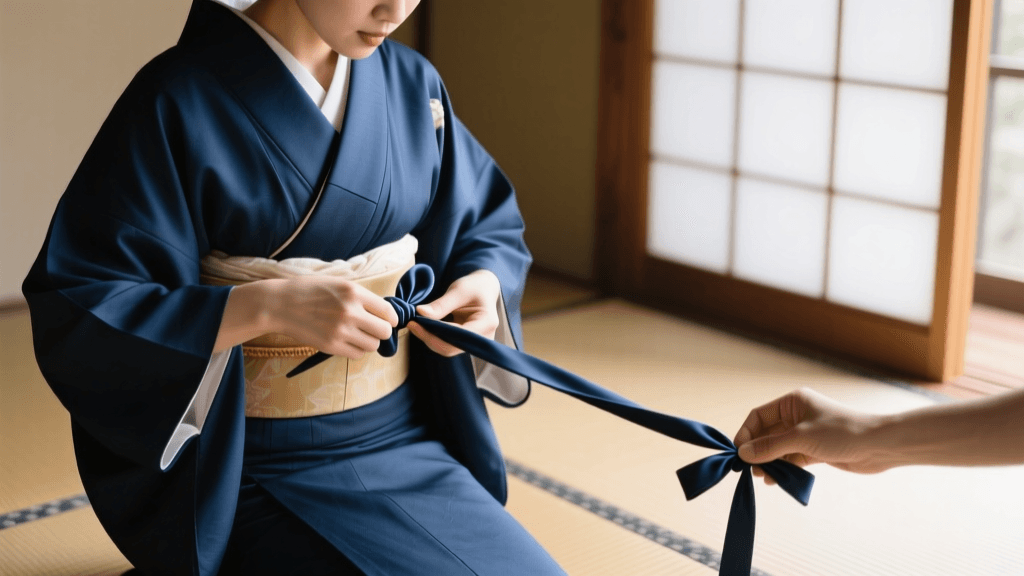
Take the obi-jime (cord) and wrap it around the exact center of the drum. Bring it to the front, cross it, and pull it tightly to the back. Tie a secure square knot at the back, tucking the ends neatly under the cord. Finally, adjust the obi-age at the front, showing just 1-2 cm of the sash above the obi, and tie it in a neat, flat knot.
Tutorial 2: Tying the Bunko Musubi (Bow Knot)
The Bunko is a youthful, playful bow knot typically tied with a Hanhaba obi over a yukata or casual komon kimono.
Step 1: Centering and Wrapping
Find the center of the Hanhaba obi and place it at the front of your waist. Wrap both ends around to the back, cross them, and bring them back to the front. Wrap around a second time, crossing them at the front.
Step 2: The Base Knot
Tie a tight, secure knot at the front center, pulling the ends firmly to ensure the obi sits snugly against your hips. The right side will be your bow loops, and the left side will be the wrapping ribbon.
Step 3: Creating the Bow Loops
Take the right end and fold it into two or three accordion-style pleats to create the wings of the bow. Pinch the center of the pleats tightly.
Step 4: Wrapping the Center
Take the left end (the ribbon) and wrap it tightly around the pinched center of the bow loops. Wrap it two or three times until the length is used up. Tuck the remaining end securely into the back of the obi wrap.
Step 5: Rotating and Adjusting
Hold the entire knot securely and rotate the obi clockwise from the front to the back. Adjust the bow loops so they fan out symmetrically, and pull the center knot tight.
Cultural Etiquette: Matching the Knot to the Occasion
In Japanese culture, the style of your obi knot communicates vital information about your social standing, age, and the formality of the event you are attending. Wearing the wrong knot can be considered a faux pas, akin to wearing a ballgown to a casual brunch.
The Otaiko Musubi is the undisputed standard for mature women. Its subdued, boxy elegance conveys modesty and refinement, making it the mandatory choice for visiting shrines, attending tea ceremonies, or participating in formal gatherings like weddings (when paired with a Kurotomesode or Homongi kimono).
Conversely, the Bunko Musubi and its more elaborate variations (like the Fukura-suzume or Yuragi) are traditionally reserved for unmarried women, girls, and casual summer yukata wear. The prominent, decorative loops of the bow signify youth and vibrancy. When renting a kimono in tourist hubs like Kyoto or Asakusa, rental shops will often default to the Otaiko for older clients and the Bunko or Kawari (fancy) knots for younger clients. Understanding these nuances not only improves your dressing technique but also deepens your appreciation for the silent language of traditional Japanese textiles.
Troubleshooting Common Obi Mistakes
- The Obi Slips Down: This is usually caused by insufficient tension during the wrapping phase. Always wrap the obi over the hip bones, not the natural waist, and pull the koshihimo as tight as comfortably possible.
- Wrinkling in the Front: If the front of a Nagoya obi wrinkles, you may be missing the front obi-ita board. Insert the board between the first and second wraps of the obi to force the fabric into a smooth, cylindrical shape.
- The Otaiko Sags: A sagging drum means the obi-makura is not positioned high enough, or the obi-jime was not pulled tight enough. Ensure the cord acts as a structural anchor, compressing the center of the drum.
Conclusion
Mastering the art of the obi takes patience, practice, and an understanding of the garment's structural engineering. Whether you are tying a casual Bunko for a summer festival or a formal Otaiko for a tea ceremony, the correct use of accessories and precise measurements will ensure your kimono ensemble is both culturally respectful and visually stunning.