How to Tie an Obi: Step-by-Step Otaiko and Bunko Knot Tutorials
Introduction to the Art of Obi Tying
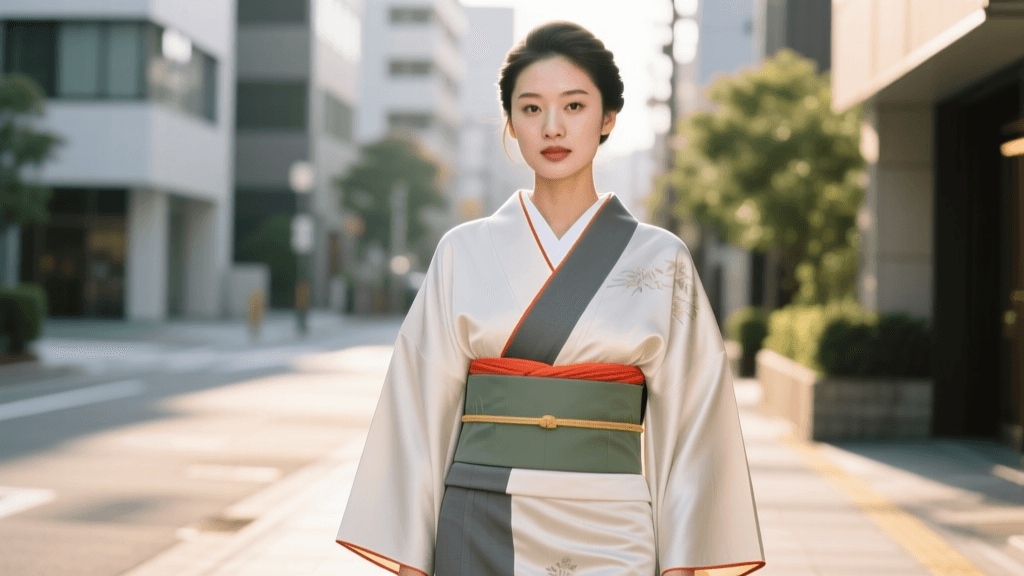
The obi is widely considered the soul of the kimono. While the kimono itself is a flat, T-shaped garment, it is the obi that provides structure, silhouette, and a vibrant canvas for artistic expression. Historically, as noted by the Metropolitan Museum of Art, the obi transformed from a simple, narrow cord used merely to hold the garment closed into a wide, elaborate sash that became the focal point of Japanese fashion during the Edo period (1615–1868). Today, mastering the art of obi tying, known as kitsuke, is a respected skill that blends technical precision with aesthetic grace.
For beginners and intermediate learners, navigating the hundreds of traditional obi knots can feel overwhelming. However, mastering just two foundational knots—the casual Bunko Musubi (bow knot) and the semi-formal Otaiko Musubi (drum knot)—will prepare you for nearly any occasion, from summer festivals to tea ceremonies. In this comprehensive guide, we break down the essential tools, fabric types, and step-by-step techniques required to tie these iconic knots securely and beautifully.
Essential Obi Accessories You Will Need
Before attempting to tie an obi, you must gather the proper dressing accessories. The modern kimono silhouette relies on these hidden tools to maintain its smooth, cylindrical shape and keep the heavy silk securely in place throughout the day.
- Koshi-himo (Tying Cords): You will need at least three to four cotton cords, typically 100 cm in length. These are used to secure the kimono and obi in place before the final decorative knot is tied.
- Obi-ita (Stiffener Board): A rigid or semi-rigid board (usually 15 x 20 cm) wrapped in fabric. It is placed between the layers of the obi at the front of the body to prevent unsightly creases and wrinkles.
- Makura (Obi Pillow): A small, padded cushion (approx. 15 x 5 cm) used specifically for formal knots like the Otaiko to give the "drum" its signature three-dimensional volume and lift.
- Obi-age (Silk Scarf): A piece of dyed silk cloth that wraps around the makura, hiding the pillow while adding a pop of contrasting color at the top edge of the obi.
- Obi-jime (Braided Cord): A decorative, braided silk cord that wraps around the center of the tied obi, securing the knot and serving as a vital structural anchor.
Understanding Obi Types and Formality
Choosing the correct knot requires understanding the type of obi you are working with. The Victoria and Albert Museum highlights that the evolution of the obi led to distinct categories based on width, length, and formality. Using a casual obi for a formal knot, or vice versa, is a common beginner mistake.
| Obi Type | Width / Length | Formality Level | Best Knots |
|---|---|---|---|
| Hanhaba Obi | 15 cm / 3.5 - 4 m | Casual (Yukata, Wool) | Bunko, Asagao, Katabasami |
| Nagoya Obi | 30 cm / 3.2 m | Semi-Formal to Formal | Otaiko, Ichiju-Daiko |
| Fukuro Obi | 30 cm / 4.2 m | Highly Formal | Niju-Daiko, Fukura Suzume |
For the tutorials below, we will use a Hanhaba Obi for the Bunko knot and a Nagoya Obi for the Otaiko knot, as these are the most common pairings for modern wearers.
Tutorial 1: The Bunko Musubi (Casual Bow Knot)
The Bunko Musubi resembles a classic bow and is the quintessential knot for yukata (summer cotton kimono) and casual outings. It is youthful, playful, and relatively easy to tie by yourself using a Hanhaba obi.
Step-by-Step Instructions
- Find the Center: Fold the Hanhaba obi in half to find the exact center point. Mark this mentally or with a small clip. This center mark will be the starting point of your wrap.
- Wrap the Body: Place the center of the obi against your front hip. Wrap the obi tightly around your waist twice, ensuring the bottom edge sits at your desired height (typically just below the natural waist for yukata). Keep the tension firm and even.
- Secure the Base: Once wrapped, bring both ends to the front. Cross the right end over the left end and pull it up through the loop you just created, pulling it tight against your body. Tie a temporary, secure square knot. Use a koshi-himo cord over this knot to hold it firmly in place while you work on the bow.
- Create the Bow Loops: Take the longer end (the tare) and fold it into an accordion-style pleat to create the "wings" of the bow. Pinch the center of the pleats tightly.
- Wrap the Center: Take the shorter end (the te-saki) and wrap it tightly around the pinched center of your bow loops two or three times. Tuck the remaining tail securely under the wrapped cord.
- Position and Finalize: Untie the temporary front knot and carefully rotate the entire obi assembly to the back of your body. Adjust the bow so it sits squarely in the center of your back. Fluff the loops to your desired width.
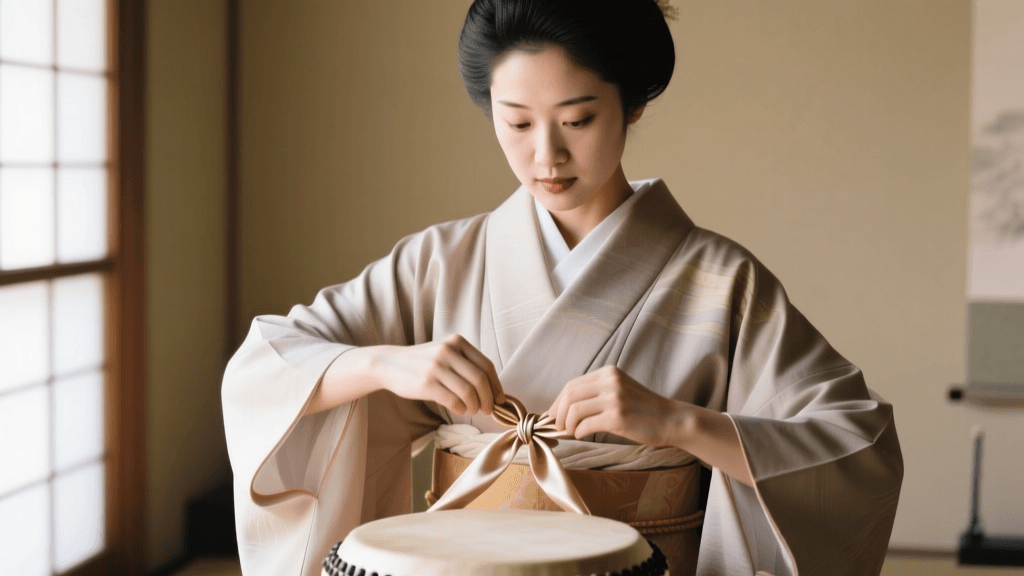
Tutorial 2: The Otaiko Musubi (Formal Drum Knot)
The Otaiko Musubi, translating to "drum knot," is the most ubiquitous formal knot for adult women. Characterized by its smooth, rounded "drum" shape at the back, it is elegant, understated, and appropriate for weddings, tea ceremonies, and formal dining. This tutorial utilizes a Nagoya obi, which is partially pre-sewn to make the complex folding more manageable.
Step-by-Step Instructions
- Prepare the Nagoya Obi: The Nagoya obi has a narrow, folded section (the te-saki) and a wide, open section (the tare). Hold the narrow end and wrap it around your waist from front to back, starting at your right hip. Wrap it around twice, keeping the bottom edge level.
- Cross and Lift: Bring both ends to the front. Cross the wide tare end over the narrow te-saki end. Pull the narrow end up and over the top edge of the obi wrap, then pull it tightly to the right side. Secure this intersection tightly with a koshi-himo cord.
- Insert the Obi-ita: Slide your front obi-ita stiffener board between the layers of the obi at the front of your body to create a smooth, flat surface.
- Create the Drum Shape: Move to the back. Take the wide tare end and fold it upward. Insert the makura (obi pillow) into the fold, positioning it so the padded side faces outward. Wrap the obi-age silk scarf around the makura and bring the ends to the front, tying a temporary knot.
- Form the Otaiko Bridge: Pull the wide tare end down over the makura, creating a smooth, taut "bridge" or drum surface. The bottom edge of the tare should align with the bottom edge of the obi wrapped around your waist.
- Secure the Tare: Fold the excess fabric of the tare underneath and inward, hiding the raw edge. Use a specialized clip or a koshi-himo to hold this folded edge tightly against the bottom of the obi wrap on your back.
- Apply the Obi-jime: Take your braided obi-jime cord and wrap it around the exact center of the drum bridge. Bring the ends to the front, tie a secure, flat decorative knot (such as the awabi musubi), and tuck the fringed tails neatly into the sides of the knot.
Pro Tips for All-Day Comfort and Security
Tying an obi is not just about aesthetics; it is about structural engineering. A poorly tied obi will slip, sag, or cause severe back pain within a few hours. Follow these expert tips to ensure your kitsuke lasts from morning until night.
- The "Breath and Tighten" Technique: When wrapping the obi around your waist and tying the initial koshi-himo cords, exhale deeply. Pull the cords tight on the exhale. This ensures that when you breathe normally or eat a meal later in the day, the obi will not feel suffocatingly tight.
- Posture is Paramount: Always stand with your back completely straight and your shoulders relaxed while tying the back knots. If you hunch forward while creating the Otaiko drum, the knot will pull away from your body and sag outward the moment you stand up straight.
- Use Friction to Your Advantage: If you are working with slippery silk Fukuro or Nagoya obis, place a small piece of double-sided kimono tape or a textured cotton towel under the obi-ita board to prevent the silk layers from sliding against one another throughout the day.
"The beauty of the kimono lies not just in the silk, but in the tension of the tie. A well-tied obi supports the body and elevates the spirit, turning a simple garment into a posture of grace." — Traditional Kitsuke Proverb
Conclusion
Learning to tie an obi is a rewarding journey into the heart of Japanese sartorial tradition. While the Bunko knot offers a breezy, accessible entry point for summer festivals and casual wear, the Otaiko knot opens the door to the refined, elegant world of formal Japanese occasions. By understanding the distinct roles of your accessories, respecting the formality of your fabrics, and practicing these step-by-step techniques, you will soon be tying your obi with confidence, comfort, and authentic style. Grab your hanhaba and nagoya obis, clear a space in front of a full-length mirror, and begin practicing the timeless art of kitsuke today.