How to Tie an Obi: Step-by-Step Kimono Belt Tutorial
The Art of the Obi: More Than Just a Belt
The obi is the iconic sash that secures the Japanese kimono, transforming a simple T-shaped garment into a canvas of structured elegance. According to the Victoria and Albert Museum, the obi evolved significantly over the centuries from a thin, functional cord into a wide, elaborate sash that often costs more than the kimono itself. Today, tying an obi is a respected art form, requiring precision, specific accessories, and an understanding of traditional aesthetics.
Whether you are preparing for a summer festival in a lightweight yukata or attending a formal tea ceremony, mastering the art of the obi knot (musubi) is essential. This comprehensive guide will walk you through the tools, measurements, and step-by-step techniques for tying the two most fundamental obi knots: the casual Bunko Musubi (Bow Knot) and the formal Nijuudaiko Musubi (Double Drum Knot).
Understanding Obi Types and Measurements
Before attempting to tie an obi, you must select the correct type for your occasion and garment. Standard women's obi measurements vary significantly based on formality:
- Hanhaba Obi (Half-Width): Measures approximately 15 cm wide and 3.6 meters long. Used for casual wear and yukata.
- Nagoya Obi: Measures about 30 cm wide and 3.6 meters long, with one end pre-folded and stitched for easier tying. Ideal for semi-formal occasions.
- Fukuro Obi (Bag Obi): Measures 30 cm wide and 4.2 to 4.5 meters long. Fully patterned on one side, this is the standard for formal wear and weddings.
Essential Obi Accessories
You cannot tie a traditional obi using only the fabric. A network of hidden ties and structural supports is required to maintain the silhouette and prevent slipping. Below is a breakdown of essential accessories, their Japanese names, and average retail costs in USD.
| Accessory | Japanese Name | Purpose | Average Cost |
|---|---|---|---|
| Waist Tie | Koshihimo | Thin cotton ties used to secure the kimono and obi in place. | $8 - $15 |
| Under-Sash | Datejime | A wide, elasticized belt that smooths the kimono fabric before the obi. | $10 - $20 |
| Front Board | Obi-ita | A stiff board inserted in the front to prevent the obi from creasing. | $12 - $25 |
| Obi Pillow | Obi-makura | A small cushion used to give volume and shape to formal drum knots. | $10 - $18 |
| Decorative Cord | Obi-jime | A braided cord tied over the obi to secure the knot and add contrast. | $15 - $50 |
| Sash Cover | Obi-age | A silk cloth that wraps the obi-makura, peeking out above the obi. | $20 - $60 |
Preparation: The Base Wrap
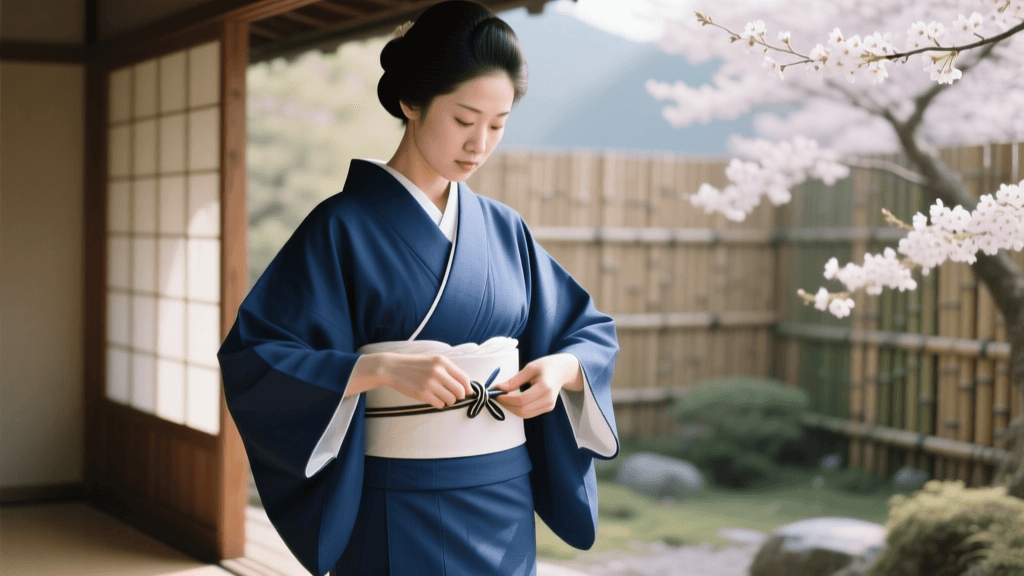
Regardless of the knot you choose, the initial wrapping of the obi follows a universal rule. Always wrap the kimono and the obi left over right. Wrapping right over left is strictly reserved for dressing the deceased for funerals. Once your kimono is secured with a koshihimo and datejime, slip the obi-ita between the kimono and the obi at the front center. This ensures a crisp, wrinkle-free appearance across your stomach.
Tutorial 1: Bunko Musubi (The Bow Knot)
The Bunko Musubi is a simple, elegant bow typically tied with a hanhaba obi for casual summer yukatas. It is beginner-friendly and takes about 5 to 10 minutes to complete.
Step 1: Find the Center and Wrap
Locate the center of your hanhaba obi. Place the center against your front right hip. Wrap the obi around your back to the left, then bring it back to the front. Ensure the bottom edge aligns with your desired height (usually just below the bust for younger women, or at the natural waist for mature women). Wrap it around a second time, pulling tightly to secure the base.
Step 2: Cross and Tie the Base
Cross the two ends at the front center. Take the end that is now on the top and thread it under the bottom end, pulling it up and out to create a tight, foundational square knot. The shorter end (called the tesaki) should point upward, while the longer end (the tare) points downward.
Step 3: Form the Bow
Take the long tare end and fold it into an accordion-style pleat to create the loops of the bow. Pinch the center of this pleated section. Take the shorter tesaki end, wrap it tightly around the pinched center of the bow, and tuck the remaining tail underneath the base knot to hide it.
Step 4: Position and Secure
Hold the base knot firmly with one hand and the obi fabric with the other. Slowly rotate the entire obi clockwise around your body until the bow sits perfectly in the center of your back. Fluff the loops to resemble a butterfly or open book.
Tutorial 2: Nijuudaiko Musubi (The Double Drum Knot)
The Nijuudaiko is the most common formal knot, worn with fukuro or Nagoya obi for weddings, tea ceremonies, and graduations. The name translates to 'double drum,' symbolizing the folding of the fabric which creates a layered, drum-like shape. This knot takes 15 to 20 minutes and requires an obi-makura, obi-jime, and obi-age.
Step 1: Measure the Tesaki
Drape the obi over your shoulders with the patterned side facing out. Measure the tesaki (the finished, narrower end of a Nagoya obi, or the folded end of a Fukuro obi) so it hangs down to about the hem of your kimono. Hold this end securely at your front center.
Step 2: Wrap and Tie
Wrap the longer tare end around your body twice, keeping the bottom edge parallel to the floor. Pull it taut. At the front center, cross the tare over the tesaki. Thread the tare up through the loop you just created between the obi and your body, pulling it down tightly to lock the base knot.
Step 3: Insert the Obi-Makura
Take the long tare end and fold it up to create the 'drum'. Insert the obi-makura (pillow) inside this fold to give it volume. Wrap the obi-age (silk cover cloth) over the pillow and tie it temporarily at the front to hold the structure in place.
Step 4: Fold the Drum and Secure
Fold the tare end down over the obi-makura to create the flat front of the drum. Tuck the remaining tail of the tare underneath the base wrap at the back. Bring the tesaki end up to meet the top of the drum. Finally, tie the obi-jime (decorative cord) tightly around the exact center of the drum to secure everything. Rotate the obi to the back, adjust the obi-age at the front so only a sliver shows, and tie the obi-jime in a decorative knot at the front center.
Comparison Chart: Bunko vs. Nijuudaiko
| Feature | Bunko Musubi (Bow) | Nijuudaiko Musubi (Drum) |
|---|---|---|
| Best Obi Type | Hanhaba (Half-width) | Fukuro or Nagoya |
| Formality Level | Casual / Summer Festivals | Formal / Ceremonies / Weddings |
| Difficulty | Beginner (1-2 stars) | Advanced (4-5 stars) |
| Time to Tie | 5 - 10 minutes | 15 - 25 minutes |
| Required Extras | None (Optional decorative pins) | Obi-makura, Obi-age, Obi-jime |
Renting vs. Buying: What to Expect
For tourists and beginners, renting is often the most practical introduction to kimono dressing. The Japan National Tourism Organization (JNTO) highlights that kimono rental shops are ubiquitous in cultural hubs like Kyoto, Kanazawa, and Tokyo's Asakusa district. A standard rental package, which includes a pre-tied obi or professional dressing assistance, typically costs between $30 and $80 USD and takes about 30 to 45 minutes in the salon. Conversely, purchasing an authentic silk fukuro obi from a specialist dealer can range from $150 for vintage pieces to over $2,000 for new, hand-woven Nishijin-ori textiles.
Troubleshooting and Cultural Etiquette
Even experienced wearers encounter issues. If your obi slips down throughout the day, it is usually because the base koshihimo was not tied tightly enough, or the silk fabric is too slippery. Modern dressers often use an anti-slip silicone belt (called a korin belt) beneath the obi to grip the fabric. If your formal drum knot sags, ensure the obi-makura is tied securely high on the back and that the obi-jime is pulled taut.
When wearing a kimono and obi in public, cultural respect is paramount. The Kyoto City Official Travel Guide advises visitors to be mindful of their surroundings, particularly when visiting shrines and temples. Ensure your obi knot does not brush against ancient wooden structures or sacred artifacts, and always sit carefully to avoid crushing the delicate silk folds of the Nijuudaiko drum. By understanding the mechanics and etiquette of the obi, you honor the centuries of textile artistry woven into every thread.