DIY Mamianqun Sewing: Patterns, Fabrics, and Step-by-Step Guide
Introduction to the Mamianqun
The Mamianqun, widely known as the 'horse-face skirt,' is one of the most iconic and enduring garments in traditional Chinese clothing. Originating in the Song Dynasty and reaching its zenith during the Ming Dynasty, this skirt is characterized by its flat front and back panels flanked by intricate, overlapping side pleats. According to The Metropolitan Museum of Art's Heilbrunn Timeline of Art History, the Ming Dynasty was a period of immense cultural refinement, where textile production and sartorial elegance became central to Chinese identity. Today, the Mamianqun has experienced a massive resurgence, becoming a staple in the modern Hanfu movement and a favorite project for DIY sewing enthusiasts worldwide.
For those looking to build a traditional Asian wardrobe from scratch, sewing your own Mamianqun is a deeply rewarding endeavor. It requires no complex curved pattern drafting, making it surprisingly accessible for beginners, yet it offers enough structural complexity—particularly in the pleating process—to keep experienced sewists engaged. This comprehensive guide will walk you through fabric selection, precise mathematical measurements, and step-by-step sewing instructions to create a historically inspired, modern-wearable Mamianqun.
Understanding the Structure of a Horse-Face Skirt
Before cutting into your fabric, it is crucial to understand the anatomy of the Mamianqun. The skirt is constructed from two identical, wide rectangular panels that overlap at the sides. Each panel consists of a flat central section (the 'horse face' or mamian) and a series of knife pleats on both sides. When wrapped around the body, the flat panels align at the front and back, while the pleated sections overlap at the hips, allowing for incredible freedom of movement and a beautiful, swaying drape when walking.
The waistband is typically a separate, wide piece of fabric (historically white or contrasting cotton/linen) that encases the top edge of the skirt panels. Long, sturdy ties are attached to the ends of the waistband, allowing the wearer to wrap and secure the skirt without the need for zippers, buttons, or elastic.
Fabric Selection for DIY Hanfu
Choosing the right fabric is arguably the most critical step in Hanfu sewing. The fabric must have enough body to hold sharp pleats but enough drape to flow gracefully. The Victoria and Albert Museum's Asian Collections highlights the historical significance of silk weaves and brocades in Chinese garment making, but modern sewists have a variety of accessible options. Below is a comparison chart to help you select the best material for your skill level and budget.
| Fabric Type | Historical Accuracy | Drape & Pleat Retention | Ease of Sewing | Estimated Cost (per yard) |
|---|---|---|---|---|
| Silk Brocade | High | Excellent, but heavy | Difficult (slippery) | $40 - $100+ |
| Polyester Jacquard | Low (Modern Substitute) | Excellent, holds pleats perfectly | Easy | $10 - $25 |
| Cotton Sateen | Medium | Good, requires heavy pressing | Very Easy | $8 - $15 |
| Linen Blend | Medium | Fair, prone to wrinkling | Easy | $15 - $30 |
Recommendation for Beginners: Polyester jacquard or a high-quality poly-cotton blend is highly recommended for your first Mamianqun. These synthetic or blended fabrics hold a pressed pleat exceptionally well when treated with steam, and they are forgiving under a sewing machine needle. Avoid stretchy knits, chiffon, or highly slippery charmeuse silks until you have mastered the pleating technique.
Measurements and Pattern Drafting Math
Unlike Western skirts that rely on darts and curved waistlines, the Mamianqun is constructed from flat, rectangular panels. The magic lies in the pleat mathematics. Here is how to calculate your fabric requirements based on your body measurements.
1. Determine Your Skirt Length
Measure from your natural waist down to your desired hemline (typically the ankle bone). Add 2 inches for the top seam allowance and hem facing. For example, if your desired length is 38 inches, your cut length will be 40 inches.
2. Calculate the Panel Width and Pleats
A standard Mamianqun uses a 3:1 or 4:1 fabric-to-waist ratio to create deep, rich pleats. Let's use a 3:1 ratio for this example.
- Waist Measurement: 30 inches
- Total Skirt Circumference Needed: 30 inches x 3 = 90 inches
- Width Per Panel: 90 inches / 2 = 45 inches per panel
Each of your two main rectangular panels will measure 40 inches (length) by 45 inches (width). The flat 'horse face' panel in the center of each piece will typically measure half of your waist circumference (15 inches), leaving 30 inches of fabric on the sides to be folded into pleats.
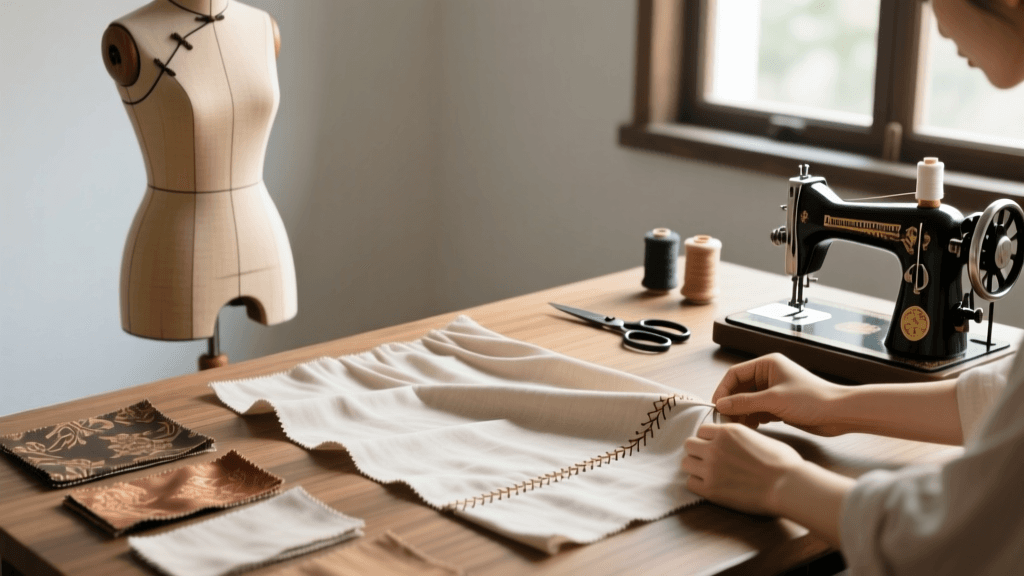
Step-by-Step Sewing Guide
Step 1: Cutting and Prepping the Fabric
Pre-wash, dry, and iron your fabric to prevent future shrinkage. Cut your two main skirt panels according to your calculated dimensions. Additionally, cut one waistband piece measuring 4 inches wide by (your waist + 4 inches for overlap), and four long tie straps measuring 3 inches wide by 36 inches long.
Step 2: Hemming and Edge Finishing
Finish the bottom hem of both large panels before pleating. A narrow rolled hem or a blind stitch hem works best to maintain a clean, historical look. Press the hem flat. Next, finish the raw vertical side edges of the panels using a serger or a tight zigzag stitch to prevent fraying during the pleating process.
Step 3: The Pleating Process
This is the most labor-intensive step. You will need a large, heat-resistant surface, plenty of glass-head pins, and a steam iron.
- Create a cardboard pleating template. If you want 1-inch visible pleats with a 2-inch underfold, cut notches into your cardboard at 1-inch and 3-inch intervals.
- Starting from the center of the panel (leaving the 15-inch flat mamian section unpleated), fold the fabric back and forth, using your template to ensure every pleat is exactly the same width.
- Pin each pleat securely to your ironing board cover.
- Once all side pleats are pinned, apply heavy steam and press firmly. Do not drag the iron; use an up-and-down pressing motion to avoid shifting the folds.
- Allow the fabric to cool and dry completely before removing the pins. Baste the top edge of the pleats together using a long straight stitch to lock them in place.
Step 4: Attaching the Waistband
Fold your waistband piece in half lengthwise and press. Sandwich the top raw edge of your pleated skirt panels between the folded waistband, aligning the flat centers. Pin heavily and sew a straight stitch through all layers, about 1/2 inch from the top edge. Fold the waistband up and press.
Step 5: Adding the Ties
Sew your tie straps into long tubes, turn them right side out, and press flat. Attach two ties to the left end of the waistband (one on the outside, one on the inside) and two ties to the right end. Ensure they are securely backstitched, as they will bear the tension of the wrapped skirt.
Styling and Wearing Your Mamianqun
Wearing the Mamianqun correctly is just as important as sewing it. Wrap the skirt around your waist, ensuring the left panel overlaps the right panel at the front. As noted in Wikipedia's comprehensive guide on the Mamianqun, this overlapping structure not only provides modesty and ease of movement but also reflects traditional Chinese sartorial philosophies regarding symmetry and layering. Secure the inner ties first, then wrap the outer ties around your back and tie them in a secure bow or knot at the front or side.
For a historically accurate Ming Dynasty silhouette, pair your Mamianqun with a traditional Ao (jacket) or a Pipa-sleeve blouse. For a modern, fusion street-style look, the Mamianqun pairs beautifully with a simple fitted turtleneck, a crisp button-down shirt, or even a tailored blazer, proving that this centuries-old garment remains a versatile masterpiece of Asian fashion.