Master the Bunko Obi Knot: A Step-by-Step Kimono Guide
Introduction to the Bunko Obi Knot
The Japanese kimono is a masterpiece of textile art, but its true structural and aesthetic anchor is the obi. While the kimono itself is cut in straight lines and relies on folding and wrapping to conform to the human body, the obi provides the necessary tension, silhouette, and decorative focal point. Among the dozens of intricate knots (musubi) developed over centuries of Japanese fashion history, the Bunko knot remains the most iconic, accessible, and widely worn style for women today.
The Bunko knot, which translates roughly to book or library knot, visually resembles an open book or a delicate butterfly resting on the lower back. It is the standard knot for the yukata (summer cotton kimono) and casual everyday komon kimono. According to the Victoria and Albert Museum, the evolution of the obi from a narrow, utilitarian cord in the Heian period to the wide, highly decorative sash of the Edo period fundamentally changed how Japanese garments were worn and tied. The Bunko knot emerged as a practical yet beautiful solution for the wider hanhaba (half-width) obi, allowing wearers to secure the garment firmly while displaying a charming, symmetrical bow.
Whether you are preparing for a summer fireworks festival (hanabi taikai), participating in a cultural exchange, or simply exploring the art of kitsuke (kimono dressing) at home, mastering the Bunko knot is an essential milestone. This comprehensive, step-by-step tutorial will guide you through the precise measurements, folding techniques, and cultural nuances required to tie a flawless Bunko knot.
Essential Tools and Measurements for the Bunko Knot
Before attempting to tie the knot, it is crucial to gather the correct accessories. Kimono dressing relies heavily on specialized undergarments and ties that provide structure and prevent the silk or cotton fabrics from slipping.
| Item | Japanese Term | Dimensions / Specifications | Purpose |
|---|---|---|---|
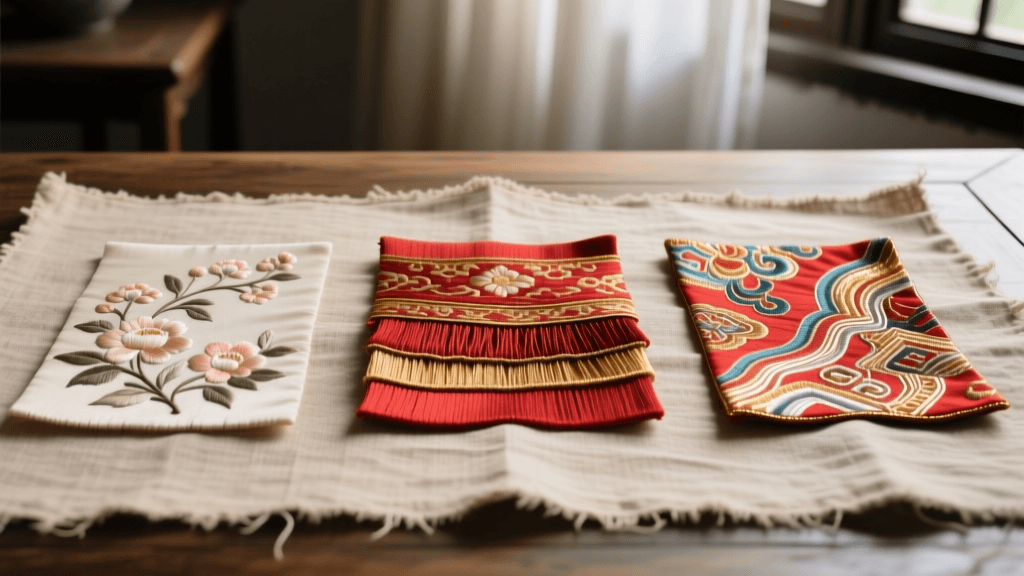
| Half-Width Obi | Hanhaba Obi | Approx. 15-16 cm wide, 360-400 cm long | The primary sash used for yukata and casual kimono; ideal for the Bunko knot. |
| Waist Tie | Koshihimo | Approx. 5 cm wide, 100 cm long | A thin cotton or silk cord used to secure the kimono fabric at the waist before the obi is applied. |
| Under-Sash | Datejime | Approx. 8-10 cm wide | A wider, elasticized or silk band that wraps over the koshihimo to flatten the kimono fabric and provide a smooth base for the obi. |
| Obi Board | Obi-ita | Approx. 15 cm wide, 30 cm long | A stiff board inserted into the front of the obi to prevent creasing and maintain a crisp, flat silhouette. |
| Temporary Clip | Obi-clip | Standard binder clip or specialized plastic clip | Used to hold the short end of the obi in place while wrapping the long end. |
For beginners, a reversible cotton or polyester hanhaba obi is highly recommended. These materials offer more friction than pure silk, making the wrapping process more forgiving. As noted by the Japan National Tourism Organization, engaging in traditional arts like kitsuke requires patience and the right tools, transforming the act of dressing into a mindful cultural practice rather than a mere fashion choice.
Step-by-Step Tutorial: Tying the Bunko Knot
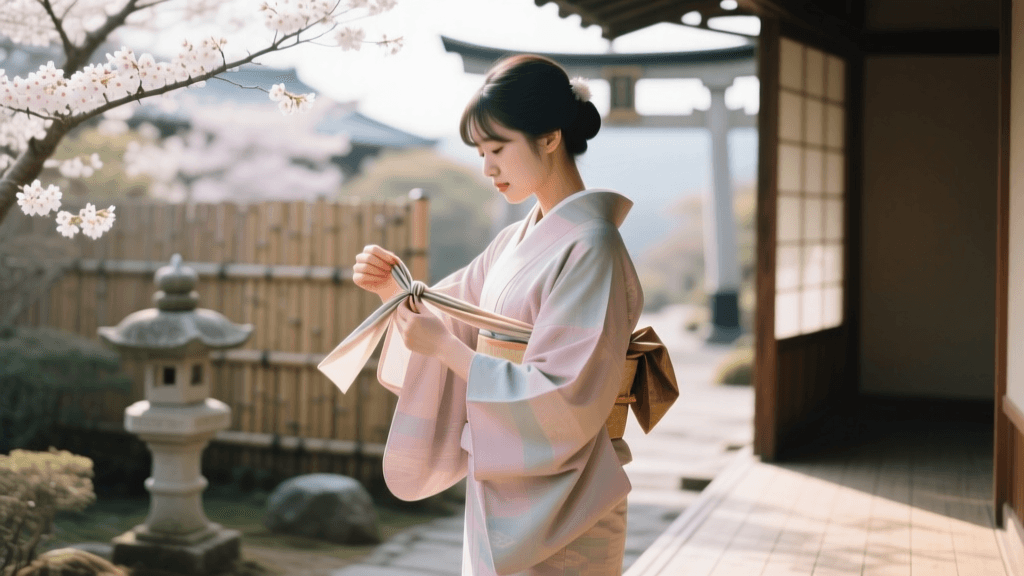
Dressing in a kimono requires a specific posture. Stand straight, keep your shoulders relaxed, and breathe normally. Tension is the secret to a secure obi; if you pull too tightly while holding your breath, the knot will loosen as soon as you exhale.
Step 1: Preparing the Obi and Finding the Center
Drape the hanhaba obi over your shoulders like a scarf. You must determine the te (the short end) and the tare (the long end). For a standard Bunko knot, the te should measure approximately 40 to 50 centimeters from the end to your center front. This short end will eventually become the center knot of the bow. Once you have measured the te, bring both ends to your front. Cross the te over the tare at your center waistline. Use your obi-clip to secure the te to the upper edge of the kimono collar (eri) on your left shoulder. This keeps the short end out of your way while you work with the long end.
Step 2: Wrapping the Obi Around the Waist
Take the tare (the long end) and pull it tightly around your waist to the back, then bring it back to the front. Ensure the bottom edge of the obi sits exactly on top of your datejime (under-sash). Wrap the tare around your waist a second time. When you return to the front, pull the fabric taut. The tension here is critical; the obi must feel snug but should not restrict your breathing or digestion. At the front center, cross the tare over the top of the te (which is still clipped to your shoulder). Pull the tare upward, under the two layers of wrapped obi, and pull it down tightly. This creates a secure, temporary anchor knot at the front. You can now unclip the te from your shoulder and bring it down to the front center.
Step 3: Creating the Bow (Hane) and the Knot
Now, you will work entirely at the front of your body before rotating the finished knot to the back. Take the remaining length of the tare and begin creating the hane (the wings or loops of the bow). The traditional method uses an accordion fold. Fold the fabric back and forth, creating pleats that are approximately 15 centimeters wide (matching the width of the hanhaba obi). You should aim for 4 to 6 pleats, depending on the total length of your obi and your personal preference for the bow size. Once the accordion pleats are formed, pinch them tightly together at the exact center. This pinched center will sit directly against the te. Next, take the te (the short end) and wrap it tightly around the pinched center of your pleated hane. Wrap it once, then tuck the remaining tail of the te up and under the wrapped layer, securing it firmly inside the knot. You have now created the complete Bunko knot at the front of your waist.
Step 4: Inserting the Obi-ita and Final Adjustments
Before rotating the obi, slide your obi-ita (obi board) between the two wrapped layers of the obi at the front. This will instantly smooth out any wrinkles and give the front sash a professional, structured appearance. Ensure the board is centered and sits neatly against your abdomen.
Step 5: Securing and Transferring to the Back
Place your hands on the top and bottom edges of the wrapped obi. In one smooth, deliberate motion, slide the entire obi assembly clockwise around your waist until the bow is positioned squarely in the center of your back. Be careful not to disturb the collar of the kimono while sliding the obi. Once the bow is in the back, reach behind you to adjust the hane. Fan out the accordion pleats slightly so they resemble an open book or butterfly wings. Ensure the knot is sitting high on the back, just below the shoulder blades, as a drooping bow is considered sloppy in traditional kitsuke.
Common Mistakes and Pro Tips
Even experienced dressers encounter challenges when tying the Bunko knot. Here are some expert tips to refine your technique:
The most common mistake beginners make is losing tension during the transition from the front wrap to the bow creation. Always keep one hand firmly pressing the wrapped layers against your waist while your other hand manipulates the fabric. Furthermore, ensure your kimono collar is adjusted to show exactly one fist-width of the nagajuban (under-kimono) at the back of the neck before you begin tying the obi. - Master Kitsuke Instructor
- Slipping Fabrics: If your silk obi refuses to stay tied, use a small piece of double-sided fabric tape (specifically designed for textiles) at the intersection of the te and tare during the initial front wrap.
- Asymmetrical Wings: If the hane (wings) look uneven after transferring the bow to the back, do not untie the knot. Simply reach back and adjust the pleats individually, pulling more fabric from the tare side to balance the visual weight.
- Posture Check: When wearing an obi, your center of gravity shifts slightly. Walk with smaller steps and keep your back straight to maintain the elegant silhouette and prevent the bow from sagging.
Cultural Context and Modern Styling
The Bunko knot is deeply embedded in Japanese seasonal culture. While it is worn year-round with casual kimono, it reaches peak visibility during the summer months. From July to August, millions of locals and tourists don yukata to attend Bon Odori dances and fireworks festivals. The Bunko knot is favored for these events because it is relatively flat against the back, making it comfortable to wear while sitting on festival grounds or navigating crowded streets.
In recent years, the Bunko knot has also become a canvas for modern, trend-driven styling. Younger generations and fashion-forward enthusiasts often incorporate vintage obijime (decorative cords) or lace accessories into the center of the knot, blending Taisho-era romanticism with contemporary Harajuku aesthetics. Additionally, as gender-inclusive kimono fashion gains traction, the Bunko knot and other traditionally feminine musubi are increasingly being adopted and adapted by wearers of all gender identities, challenging historical norms and breathing new life into Asian traditions.
By mastering the Bunko knot, you are not merely learning a mechanical skill; you are participating in a living, breathing textile tradition that bridges the Edo period with the modern global stage. Whether you are renting a yukata in Kyoto or styling a vintage komon in your home city, the perfect bow is your signature of respect for the garment and the culture it represents.