Mastering the Otaiko Musubi: Step-by-Step Obi Tying Guide
Introduction to the Otaiko Musubi (The Drum Knot)
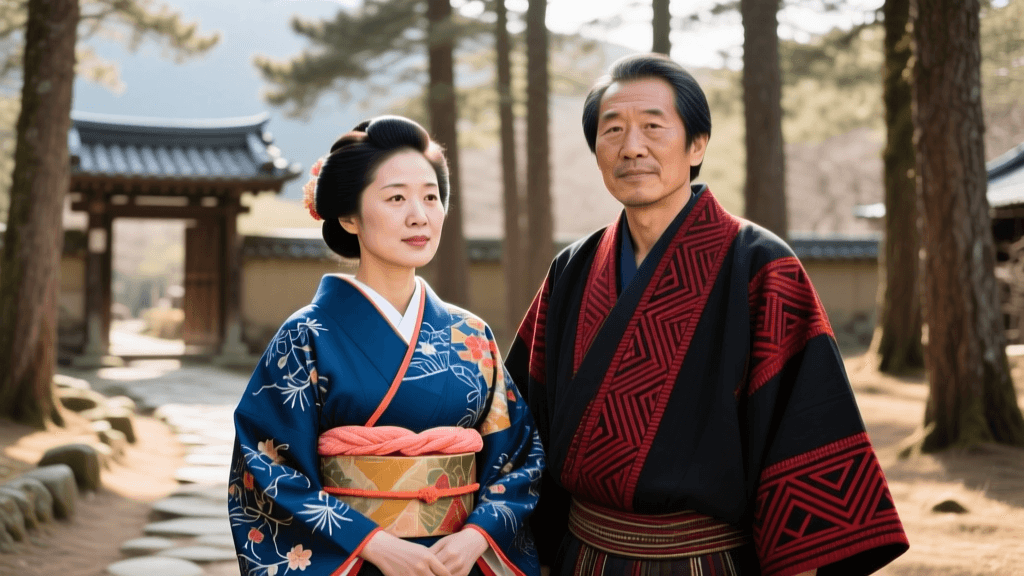
The Otaiko Musubi, universally recognized as the 'drum knot,' is arguably the most iconic and widely worn obi knot in modern Japanese formalwear. Characterized by its smooth, rounded, and structured rectangular shape at the back, it resembles the body of a traditional Japanese drum (taiko). Unlike the flamboyant, butterfly-like bows worn by younger, unmarried women, the Otaiko Musubi projects an air of understated elegance, maturity, and refined grace. It is the standard knot for married women attending formal events, tea ceremonies, and weddings, though variations are also worn by older unmarried women.
Tying a formal obi is an architectural endeavor. It requires an understanding of fabric tension, precise measurements, and the strategic use of specialized undergarments and accessories. As noted by the Victoria and Albert Museum in their comprehensive textile archives, the evolution of the obi from a narrow, functional cord in the Heian period to the wide, stiff, and highly decorative sash of the Edo period necessitated the development of complex knots like the Otaiko. Today, mastering this knot is a rite of passage for anyone studying kitsuke (the art of dressing in a kimono).
Essential Tools for Tying a Formal Obi
Before beginning the tying process, you must gather the correct tools. Attempting to tie an Otaiko Musubi without these structural aids will result in a sagging, asymmetrical knot. Below are the required items and their standard measurements:
- Fukuro Obi or Nagoya Obi: The primary sash. A standard Fukuro obi measures approximately 31-32 cm in width and 420-450 cm in length. A Nagoya obi is pre-folded and shorter, making it slightly easier for beginners.
- Koshihimo (Waist Ties): You will need at least three soft cotton or silk cords, each about 130 cm long, to secure the obi tightly to the body before the final knot is tied.
- Datejime: A wide under-belt (approx. 8-10 cm wide) worn beneath the obi to prevent the kimono fabric from shifting and to provide a smooth base.
- Obi-ita (Obi Board): A stiff, felt-covered board inserted into the front wrap of the obi to prevent wrinkling and maintain a flat, flawless silhouette.
- Obi-makura (Obi Pillow): A small, padded cushion tied around the waist. This is the 'skeleton' of the Otaiko knot, providing the necessary volume and lift to create the drum shape.
- Obiage: A decorative silk sash (approx. 30 cm x 130 cm) used to conceal the obi-makura and add a pop of contrasting color at the top edge of the knot.
- Obijime: A thick, braided decorative cord (approx. 150 cm long) tied horizontally across the center of the drum to secure the structure and add a final layer of elegance.
Comparison Chart: Otaiko Musubi vs. Other Popular Knots
Understanding where the Otaiko Musubi fits within the broader lexicon of kimono styling is crucial for proper etiquette. The table below compares the Otaiko with other common knots to help you choose the right style for your occasion.
| Knot Name | Formality Level | Target Demographic | Recommended Obi Type | Difficulty |
|---|---|---|---|---|
| Otaiko Musubi | Formal / Semi-Formal | Married women, older unmarried women | Fukuro, Nagoya | Intermediate |
| Bunko Musubi | Casual / Semi-Formal | Young, unmarried women | Hanhaba, Nagoya | Beginner |
| Nijuudaiko | Highly Formal (e.g., Black Tomesode) | Married women at weddings | Fukuro (woven with gold/silver) | Advanced |
| Tateya Musubi | Formal / Ceremonial | Young, unmarried women (Furisode) | Fukuro | Advanced |
Step-by-Step Tutorial: Tying the Otaiko Musubi
Tying the Otaiko Musubi requires patience and a good full-length mirror (or a willing assistant). Ensure your kimono is already properly adjusted, with the hemline secured and the collar forming a neat, fist-sized gap at the nape of the neck.
Step 1: Preparation and the First Wrap
Drape the obi over your shoulders with the wrong side facing out. Find the center point of the obi (or the designated starting point if using a patterned Nagoya obi). Place this center point slightly off-center at your front waist. Wrap the obi around your waist twice, ensuring the fabric is pulled taut and sits evenly. Insert the front obi-ita board between the first and second wraps to keep the front panel perfectly smooth. Secure the wrapped obi tightly with a koshihimo cord tied firmly at the front, tucking the excess cord ends into the sides.
Step 2: Creating the 'Te' and 'Tare'
The obi is now divided into two sections: the te (the shorter, decorative end) and the tare (the longer, wrapping end). For a standard Otaiko, the te should measure approximately 50 cm from the knot center—roughly the distance from your shoulder to the floor. Gather the te and the tare together at the center of your back. Cross the te over the tare, pulling upwards to create tension, and tie a temporary half-knot to hold them in place. Use a second koshihimo to tie this crossed section securely to your waist, right above the first wrap.
Step 3: Forming the Drum (Otaiko)
Take the obi-makura (pillow) and tie it around your waist, positioning it directly over the temporary knot you just made. The pillow should sit snugly against your lower back. Now, take the long tare end and fold it upwards and over the pillow. The width of this fold determines the height of your drum; aim for a smooth, even fold that covers the pillow entirely. Tuck the remaining tip of the tare into the space between the obi wraps at your side or back, hiding it completely. The 'drum' shape should now be visible.
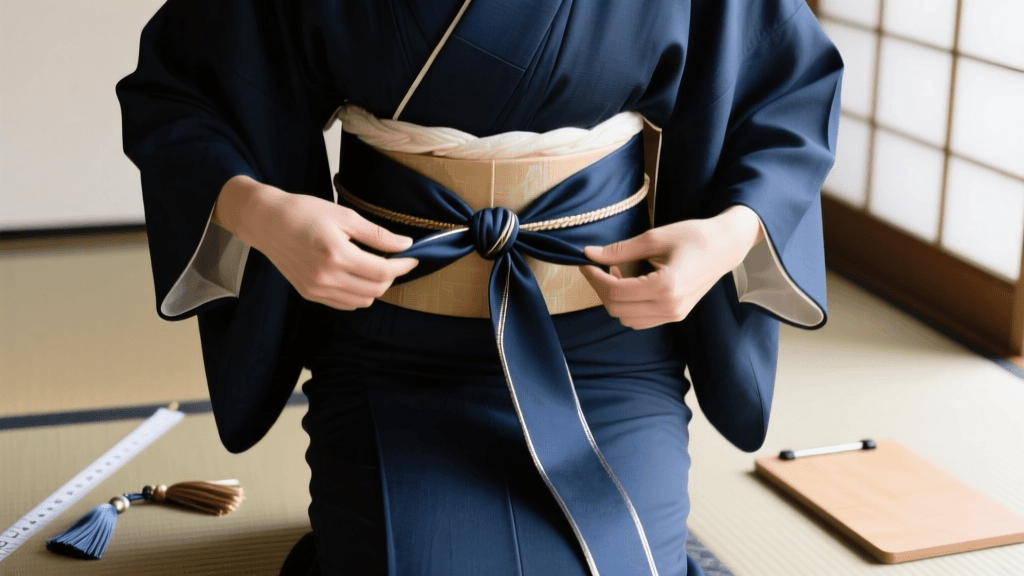
Step 4: Securing with Obiage and Obijime
To conceal the obi-makura and the top raw edges of the fold, take the obiage silk sash. Wrap it around the top of the drum, tying a temporary knot at the front. Ensure only a sliver (about 1-2 cm) of the obiage is visible above the obi at the back. Finally, take the obijime cord and wrap it horizontally across the exact center of the drum. Pull it tightly to cinch the drum shape, bring it to the front, and tie a secure, flat decorative knot (such as the hon-musubi). Tuck the obiage ends neatly into the obi at the front, and adjust the back to ensure the drum is perfectly symmetrical and horizontal.
Pro Tips for a Flawless Silhouette
Even with the right steps, achieving a professional look requires attention to subtle details. According to cultural tourism and dressing experts at Japan Experience, the tension applied during the wrapping phase is the most common point of failure for beginners. The obi must feel almost uncomfortably tight when first wrapped; as you move and breathe throughout the day, the fabric will naturally relax. If you start with a loose wrap, the heavy brocade will inevitably sag, ruining the drum shape.
Additionally, always ensure the te (the top flap of the drum at the back) lies perfectly flat against your spine without gaping. A common trick used by professional kitsuke dressers is to use a small, specialized clip or a piece of double-sided fabric tape to secure the te to the underlying obi wrap, ensuring it doesn't flip up when you walk or sit.
Cultural Context and Modern Relevance
The Otaiko Musubi is more than just a method of fastening clothing; it is a reflection of Japanese aesthetic philosophy, prioritizing harmony, structure, and subdued beauty over overt flamboyance. The drum shape itself is historically auspicious, symbolizing prosperity and the bridging of distances. As highlighted by The Japan Times during the landmark 'Kimono: Kyoto to Catwalk' exhibition, the global appreciation for the structural ingenuity of the obi continues to grow, with modern fashion designers frequently drawing inspiration from the geometric precision of knots like the Otaiko.
While the kimono is no longer everyday wear in Japan, the Otaiko Musubi remains a vital cultural skill. It is taught in specialized academies across the country, passed down from mothers to daughters, and learned by international enthusiasts who recognize the profound artistry involved in transforming a flat piece of woven silk into a three-dimensional sculpture. Whether you are preparing for a traditional tea ceremony, attending a formal wedding, or simply practicing the meditative art of kitsuke at home, mastering the Otaiko Musubi connects you directly to centuries of Japanese textile heritage.